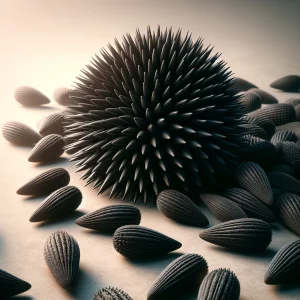
Heirloom Herb Seeds Essential: For Medicinal and Culinary Herbal Use
$42.99
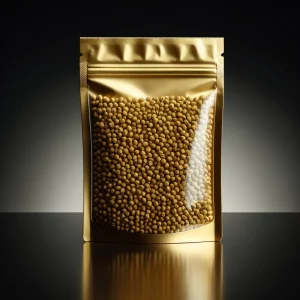
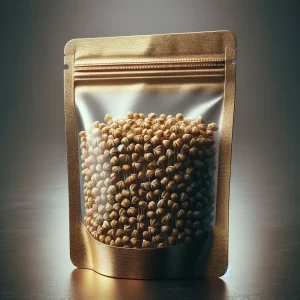
Ultimate Heirloom Herb Seeds Collection: 27 Varieties, Over 12,000 Seeds for Culinary and Medicinal Use
Unlock the Essence of Pure Flavor and Natural Health with Our Heirloom Herb Seeds Collection
Transform your garden into a sanctuary of health and flavor with our comprehensive Ultimate Heirloom Herb Seeds Collection. This meticulously curated set features over 12,000 seeds across 27 vibrant varieties, each chosen for their exceptional culinary flavors and proven medicinal benefits.
Why Choose Our Heirloom Collection?
- Diverse Varieties for Every Use: From the deep, rich taste of Italian Genovese Basil to the calming effects of Echinacea, and the bold essence of Rosemary and Thyme, cultivate a garden that’s both a culinary treasure and a natural wellness center.
- Perfect for All Gardeners: Whether you are just starting out or are a seasoned expert, these seeds offer robust growth and high yield. The set includes everything needed to create a lush, aromatic herb garden that complements any kitchen and enhances any meal.
- Cultivate with Confidence: Embrace the full garden-to-table experience with seeds that are Non-Hybrid, Non-GMO, and free from chemicals. Each seed promises purity and potency, preserving their natural heritage.
- Pristinely Packaged: Each variety is individually packed and labeled, making it easy to organize and plant your garden. The detailed labeling helps you plan your space and track your planting progress.
A Garden of Endless Possibilities Imagine your kitchen stocked with fresh herbs available at your fingertips, where every meal is infused with fresh, organic flavor—this is the promise of our Ultimate Heirloom Herb Seeds Collection. Ideal for anyone valuing the tradition of growing and using their own ingredients for both cooking and natural remedies.
An Heirloom Promise With seeds that carry stories and traditions, your garden will be more than just a place of cultivation—it becomes a legacy of biodiversity and ecological responsibility. Ideal for creating a survival garden seed bank or simply enjoying the variety and abundance of nature’s bounty.
Elevate Your Cooking and Well-Being Today Invest in your health and culinary skills with our Heirloom Medicinal and Cooking Herb Seeds collection. Click [Add to Cart] to start your journey towards a more flavorful and holistic lifestyle.
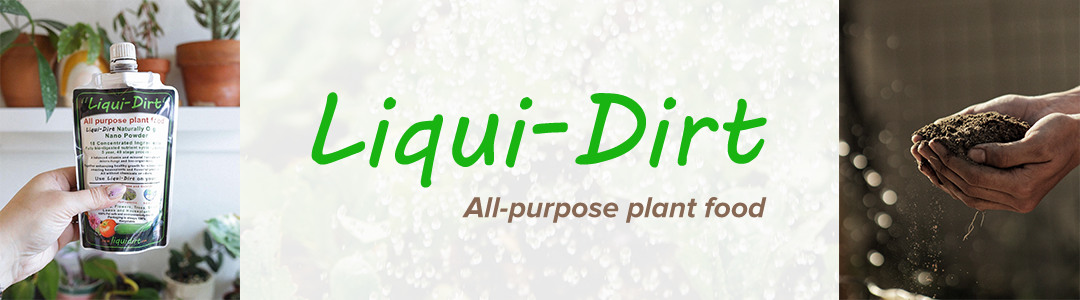
Grow a legacy with Liqui-Dirt: Where heritage meets purity.
Herb Seeds Mix
Discover the Purity of Nature with Our Premium Herb Seeds Mix
At Liqui-Dirt, we pride ourselves on nurturing the earth and harnessing its goodness without compromise. Our all-natural, open-pollinated herb seeds are a testament to our commitment to quality and sustainability. These seeds are NON-GMO, NON-Hybrid, and boast a stable germination rate that not only meets but often exceeds federal standards.
Unmatched Purity for Your Garden Every seed packet from Liqui-Dirt is a promise of purity. We strictly avoid chemicals, pesticides, or synthetic enhancers. Our seeds are never kiln-dried, ensuring that the natural vitality of the seed is preserved just for you. This meticulous process guarantees that you are planting seeds as nature intended, perfect for those who wish to cultivate their own organic herb garden.
Grown with Care on Our Eco-Conscious Farm Our Liqui-Dirt farm in picturesque southern Utah is a pioneer in ecological farming, operating entirely off the grid. Powered by renewable solar and wind energy, our farm utilizes the revolutionary Liqui-Dirt plant superfood to nourish the seeds. This natural enhancer promotes faster germination and grows stronger, more resilient plants.
A Symphony of Flavors Right at Your Fingertips Imagine your garden or windowsill brimming with vibrant herbs like Italian Genovese Basil, Echinacea, and Thyme. Our diverse mix includes unique and essential herbs such as:
- Fragrant Lavender and Lemon Balm
- Robust Italian and Curled Cress Parsley
- Exotic Anise and Marjoram
- Healing St John’s Wort and Common Chamomile …and many more!
Each variety is carefully selected to ensure diverse culinary uses, therapeutic benefits, and aesthetic appeal.
Ideal for All Climates Across the USA No matter where you reside in the USA, our herb seeds are zoned to thrive. Whether you have a sprawling backyard garden or a small balcony space, our seeds adapt to any setting, promising a lush, green yield.
Why Choose Liqui-Dirt Herb Seeds?
- Eco-Friendly: Fully organic, supporting a healthier planet.
- High Germination Rate: Success in every packet.
- Diverse Varieties: From kitchen staples to medicinal herbs.
- Complete Control: Grow your herbs the way you prefer – completely organic and unpolluted.
Embrace the complete garden-to-table experience with Liqui-Dirt Herb Seeds Mix. Perfect for gardeners seeking purity and sustainability. Click [Add to Cart] to start your journey towards a greener, more flavorful world today!
Why Choose Liqui-Dirt Herb Seeds?
Pure & Sustainable Seed Cultivation
- Chemical-Free Growth: At Liqui-Dirt, we commit to absolute natural growth conditions. Unlike some competitors, our seeds are never exposed to chemicals, pesticides, or weed killers. We ensure that what you grow is entirely organic, making our seeds ideal for your health and the environment.
- Solar & Wind Powered: Our southern Utah farm operates 100% off-the-grid using renewable energy sources for all processing. This sustainable approach minimizes our carbon footprint, supporting a greener planet.
Superior Germination & Growth
- High Germination Rate: Liqui-Dirt seeds meet and often exceed federal seed germination standards. Our quality processing means you get reliable, robust seeds for your garden every time.
- Enhanced with Liqui-Dirt Superfood: We use our proprietary Liqui-Dirt nutrient formula, which significantly boosts the strength and vitality of our seeds. This results in faster germination and more vigorous plant growth compared to standard seeds.
Diverse & Unique Herb Selection
- Wide Range of Varieties: From kitchen staples like Cilantro and Basil to unique herbs like St John’s Wort and Echinacea, our selection is unmatched. This diversity allows you to cultivate a rich, varied herb garden suited to culinary, therapeutic, or decorative uses.
- All-Zone Friendly: Our seeds are zoned for growth across the entire USA, ensuring that no matter where you live, you can enjoy successful herb gardening.
Eco-Conscious & Community-Focused
- 100% Green Operation: Our commitment to being off-grid and using only natural resources for production means every seed packet from Liqui-Dirt supports sustainable practices that care for the earth.
- Supporting Local Communities: By choosing Liqui-Dirt, you’re not just purchasing seeds; you’re contributing to a larger movement of ecological responsibility and community support.
Heirloom Seeds: A Legacy of Gardening Tradition
The Enduring Nature of Heirloom Seeds
- Longevity: Heirloom seeds are renowned for their ability to be stored for long periods if kept in proper conditions—cool, dry, and dark. Generally, these seeds can remain viable for about 2-25 years depending on the type of herb. This makes them a fantastic choice for gardeners planning a sustainable, long-term garden.
- Regeneration Capability: Beyond just longevity, heirloom seeds can reproduce true to type from one generation to the next, ensuring that you can continue growing the same authentic flavors and forms year after year.
A Brief History of Heirloom Seeds
- Cultural Heritage: The term ‘heirloom’ typically applies to varieties that have been nurtured, selected, and handed down from one family member to another for many generations. Despite the rise of commercial agriculture, these seeds have been treasured for their unique characteristics and superior taste.
- Historical Significance: Many heirloom seeds date back hundreds of years and are often connected to specific cultures and regional cuisines. They not only provide a link to our agricultural past but also help maintain biodiversity in our food sources.
Frequently Asked Questions (FAQ)
What Does ‘Organic’ Really Mean for Our Seeds?
- Strictly Natural: Our ‘organic’ label signifies that our seeds grow without any synthetic chemicals, pesticides, or genetically modified organisms (GMOs). We ensure that your planting experience is completely natural, reflecting our dedication to health and ecological integrity.
Understanding Open-Pollinated Seeds
- Genetic Diversity: Open-pollinated seeds are produced by plants that are naturally pollinated by wind, insects, or birds. This method enhances genetic diversity and allows plants to gradually adapt to local growing conditions. Each seed holds the promise of unique yet stable plant traits.
The Value of Heirloom Varieties
- Cultural and Historical Richness: Heirloom seeds are varieties that have been passed down through generations due to their valued characteristics. Not only do they offer rich flavors and robust health benefits, but they also carry historical significance and help preserve biodiversity.
What Are NON-GMO and NON-Hybrid Seeds?
- Pure Genetics: At Liqui-Dirt, our NON-GMO seeds are free from genetic engineering, meaning they maintain their natural genetic makeup. Similarly, our NON-Hybrid seeds are not crossbred with other varieties, ensuring that you grow exactly what you plant—authentic, unaltered seeds perfect for true organic gardening.
Why Choose Seeds Without Chemicals or Kiln-Drying?
- Vitality and Purity: We never use harmful chemicals or kiln-drying processes that can degrade the seed’s quality and germination potential. By avoiding these practices, we ensure that our seeds deliver the highest vitality and purest form of life straight to your garden.
Related products

Herb Seeds: Uncover the Rich Flavors, Historical Significance, Unique Characteristics, and Culinary Uses of Our Heirloom Herb Seeds
Dive into a captivating exploration of our heirloom herb seeds. Each tab below offers a unique perspective on the distinct herbs in our collection:
- How and When: Should you sow your Heirloom Herb Seeds
- Flavor Profiles: Savor the unique tastes and aromas of each herb, perfect for culinary enthusiasts looking to elevate their dishes.
- Historical Roots: Discover the fascinating historical journeys of these herbs from ancient uses to their roles in traditional cuisines around the world.
- Characteristics: Learn about the growth habits, appearance, and optimal growing conditions for each herb to successfully cultivate them in your own garden.
- Culinary Uses: Unleash the potential of each herb in your cooking with tips on how to incorporate them into recipes for maximum flavor.
- How to Save Your Herb Seeds: for next years harvest and years to come.
Embark on this aromatic and flavorful journey by clicking on the tabs below and discover the timeless treasures of our heirloom herb collection.
- Anise
- Arugula
- Basil Italian Flat
- Basil Genovese
- Caraway
- Chamomile, Common
- Chervil
- Chives
- Cilantro
- Curled Cress
- Dill Bouquet
- Dill Mammoth
- Echinacea
- Fennel, Florence
- Fenugreek
- Hyssop
- Lavender
- Lemon Balm
- Marjoram
- Mint
- Oregano Slow Bolt
- Parsley
- Rosemary
- Sage
- St. Johns Wort
- Summer Savory
- Thyme
- Vegetable Seed Set
- Liqui-Dirt Garden Fertilizer
- Herb & Vegetable Set
- Master Seed Set with Liqui-Dirt
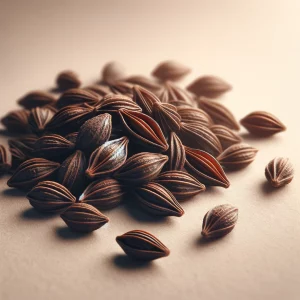
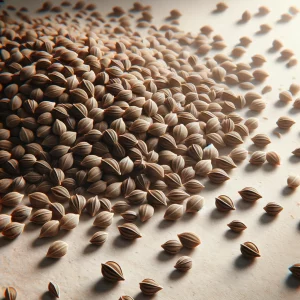
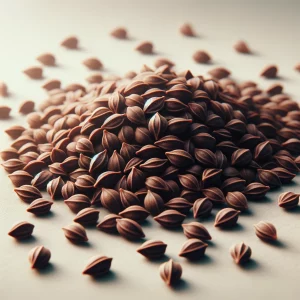
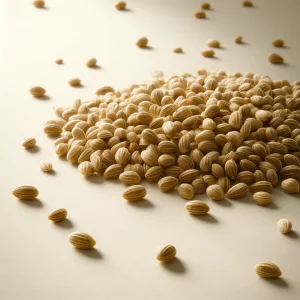
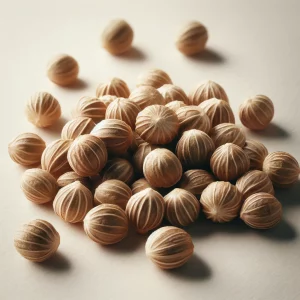
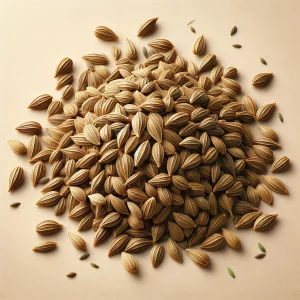
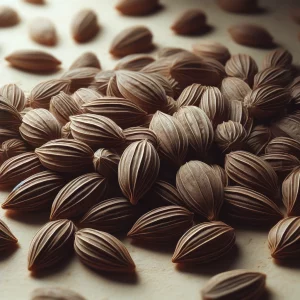
Anise seeds ready for planting
Anise herb seeds, scientifically known as Pimpinella anisum, is a flavorful and aromatic herb native to the Eastern Mediterranean and Southwest Asia. Its use dates back to ancient Egypt, where it was highly prized not only for its distinctive flavor but also for its medicinal properties. Anise was so valued that it was used as a form of currency. The Romans often included anise in their cakes and breads, especially to be eaten after feasts to aid digestion and sweeten the breath.
Anise is known for its sweet, licorice-like flavor, which comes from its herb seeds, the most commonly used part of the plant. The herb features small white flowers and feathery leaves, growing as a bushy plant that can reach up to several feet tall. Anise seeds are small, brownish-gray, and crescent-shaped when harvested and dried.
One of the unique characteristics of anise herb seeds is it’s active compound anethole, which is responsible for the distinct flavor and aroma similar to that of licorice or fennel (though they are not related). Anise is highly aromatic, making it popular in the culinary world for flavoring dishes, drinks, and confections.
In the kitchen, anise’s sweet, bold flavor makes it a popular ingredient in a variety of global cuisines. It’s frequently used in baking, particularly in European breads, cakes, and cookies. In Indian and Middle Eastern cooking, anise herb seeds are used to flavor curries, chai teas, and other spiced dishes. Additionally, anise plays a crucial role in the production of several alcoholic beverages, including French pastis, Turkish raki, Greek ouzo, and Italian sambuca, all of which rely on anise to provide their signature flavor.
Medicinally, anise herb seeds have been used to treat digestive issues, relieve cramps, and reduce nausea. Its expectorant properties make it useful in lozenges and syrups to alleviate coughs and cold symptoms. Anise herb seed oil is also used in perfumes and soaps for its sweet, rich scent.
In the garden, anise attracts beneficial insects, particularly pollinators, which help to improve the health and yield of nearby plants. Cultivating anise can be rewarding for its culinary versatility, medicinal benefits, and its ability to enhance garden biodiversity.
Growing anise (Pimpinella anisum) can be a delightful addition to your garden, not only for its aromatic seeds and leaves but also for its attractive flowering presence that benefits pollinators. Here’s how to cultivate anise effectively:
Growing Anise Herb Seeds:
- Planting Location: Anise herb seeds thrive in full sun and well-drained soil. It’s herb seeds prefers a warm climate and does not tolerate frost well.
- Soil Requirements: Plant anise herb seeds in light, fertile, well-drained soil with a pH between 6.0 and 7.0. Ensure the soil is loose enough to allow for good root development.
- Starting from Herb Seed: Anise herb seeds should be sown directly in the garden as soon as the danger of frost has passed in the spring. Plant the herb seeds 1/4 inch deep and space them a few inches apart. Thin the seedlings to about 12 inches apart once they are a few inches tall.
Caring for Anise:
- Watering: Water anise regularly to keep the soil consistently moist but not soggy. Regular watering is crucial during the growing season, especially in dry conditions.
- Feeding: Anise generally does not require much fertilizer if planted in fertile soil. However, a light application of a balanced organic fertilizer can be beneficial at the start of the growing season to encourage vigorous growth.
- Weeding: Keep the area around anise plants free from weeds, which can compete for nutrients and water.
Harvesting Anise:
- When to Harvest: Anise seeds are ready to harvest when the umbels (flower clusters) turn brown, and the seeds begin to harden, usually in late summer or early fall.
- How to Harvest: Cut the entire flower head off the plant and place it in a paper bag to catch seeds as they dry. Hang the bags in a dry, well-ventilated area. Once dried, shake the bag to release the seeds from the umbels.
Preserving Anise:
- Drying Herb Seeds: After harvesting, the herb seeds need to be thoroughly dried before storage. Spread the herb seeds out in a warm, airy place away from direct sunlight. Store the dried herb seeds in an airtight container in a cool, dark place to maintain their aroma and flavor.
- Using Leaves: Anise leaves can be used fresh in cooking. If you wish to preserve the leaves, they can be dried by hanging the stems upside down in a dry, well-ventilated area, then stripping off the dried leaves and storing them as you would the seeds.
Growing anise herb seeds offers a rewarding experience due to its usefulness in cooking and herbal medicine, as well as the charming flowers that enhance garden aesthetics. With proper care, it can provide a plentiful supply of aromatic seeds and leaves to enjoy throughout the year.
Seed Saving For The Future: Here’s an expert guide on how to harvest and store seeds from Anise, also known as Pimpinella anisum, using effective methods for optimal seed preservation:
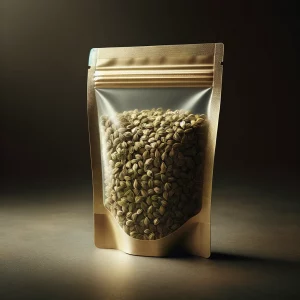
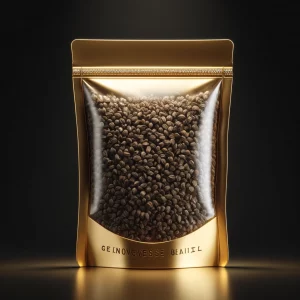
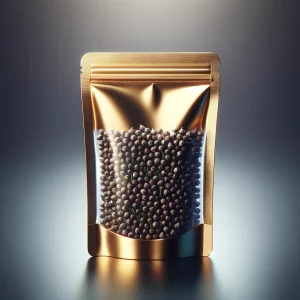
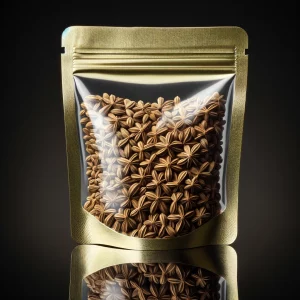
Anise with Liqui-Dirt Seed Vault Storage Pouch
Tools Needed:
- Scissors or garden shears
- Liqui-Dirt Seed Preservation Pouch
- Paper Bag
- A fine mesh sieve
- Container or bowl
Steps to Harvest Anise Seeds:
1. Identifying Seed Heads:
- Timing: Observe your anise plants as the growing season progresses. The best time to start harvesting seeds is when the umbels (flower clusters) turn brown, signaling that the seeds are mature. This usually occurs in late summer or early fall.
- Visual Inspection: Look for the characteristic umbels where small, brown seeds are visible within the clusters.
2. Collecting Seed Heads:
- Cutting: Using scissors or garden shears, carefully cut the stalks bearing the mature umbels.
- Handling: Place these stalks in a paper bag to collect any loose seeds as the umbels dry further and to prevent seed loss.
3. Drying the Seed Heads:
- Environment: Ensure the umbels are stored in a warm, dry place with ample air circulation to facilitate thorough drying.
- Preparation for Seed Removal: The seed heads must be completely dry and should easily crumble when handled; this is essential for easy seed extraction.
4. Extracting the Seeds:
- Shaking: Vigorously shake the dried stalks within the bag or over a bowl to dislodge the seeds from the umbels.
- Sieving: Use a fine mesh sieve to sift the seeds into a bowl, allowing the small seeds to pass through while keeping larger debris out.
5. Storing the Seeds:
- Labeling: Utilize the Liqui-Dirt Seed Preservation Pouch for storing your seeds; this pouch is already labeled for your convenience.
- Storage Conditions: Keep the seeds in the Liqui-Dirt Seed Vault main pouch in a cool, dry location to ensure they remain viable and are protected from moisture.
Additional Tips:
- Plant Health: Select seeds only from the healthiest plants to promote strong growth in future generations.
- Pest Control: Inspect all seed heads for pests or disease before and after drying; avoid using any that show signs of infestation.
- Seed Testing: To test seed viability, plant a few seeds in moist soil to see if they sprout effectively.
Reminder:
- Reordering Seeds: Make sure to replenish your seed stock by placing an order with Liqui-Dirt Organic Nursery and Garden at least four weeks before you plan to sow them.
Following these steps will ensure that you successfully harvest and store your Anise seeds, ready for planting in the next season or for use in various culinary applications.
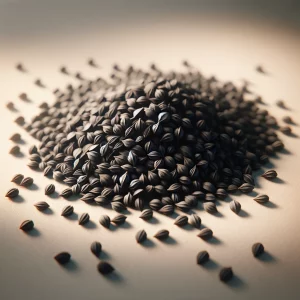
Arugula Herb Seeds ready for planting
Arugula Herb Seeds, also known as rocket, has a long and noble lineage, dating back to the Roman era where it was celebrated both as an aphrodisiac and a culinary staple. This peppery green has graced tables for centuries, appreciated for its zesty flavor that adds a spicy kick to salads and dishes.
The taste of arugula is distinctive and robust, characterized by a tangy bite with nutty undertones, which can vary in intensity depending on the maturity of the leaves. Young arugula is milder and tender, while mature leaves pack a more pungent punch.
Arugula’s unique characteristics extend beyond its flavor; it is also prized for its rich nutrient profile, containing significant levels of vitamins A, C, and K, as well as calcium and iron. Its vibrant green leaves are not only a visual enhancement to meals but also a boon to health.
In the kitchen, arugula is versatile. It can be used fresh in salads, as a peppery addition to sandwiches and wraps, or wilted into pastas and risottos. Its sharp flavor complements milder greens and stands up to strong dressings and bold ingredients like parmesan cheese and pine nuts. Beyond its raw use, arugula can be incorporated into pestos, soups, and even used as a pizza topping, added just before serving to preserve its delicate texture and piquant taste.
Growing arugula is a joy for gardeners, as it is a hardy and fast-growing crop. It thrives in cool weather, making it an excellent choice for early spring and fall plantings. Its serrated leaves can be harvested as needed, with the plant continuing to produce, ensuring a steady supply. Whether for its culinary zest or its horticultural resilience, arugula is a cherished herb in gardens and kitchens alike.
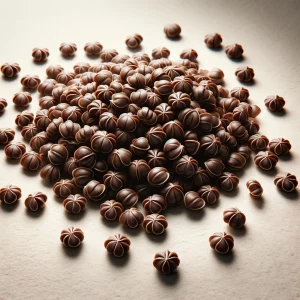
Genovese Basil Herb Seeds ready for planting
Genovese Basil Herb Seeds, often considered the gold standard for Italian basil, is a cultivar renowned for its contribution to authentic pesto alla genovese. Its lineage can be traced to the Northwest region of Liguria, Italy, where the ideal balance of seaside climate and rich soil cultivates its robust character.
This particular strain of basil boasts a sweet, pungent aroma that is more intense than that of other basil varieties, with flavor notes that are both peppery and clove-like. The leaves are a vibrant green, slightly larger and flatter than those of common basil, with a smooth, shiny surface and a tender texture. When it comes to taste, Genovese Basil is both sweet and savory, with a hint of mint and anise, adding a unique depth to dishes.
One of the herb’s most distinctive characteristics is its florets; tight clusters of small white flowers are a signal to gardeners to pinch them off, directing the plant’s energy back into leaf production. This pinching encourages a fuller, bushier plant with more of the prized leaves.
In culinary use, Genovese Basil is versatile and indispensable in Italian cooking. Its robust flavor holds up well during the cooking process, making it ideal for simmered sauces and soups. Fresh leaves are often torn over pasta dishes, layered in sandwiches, and, of course, blended into the classic pesto sauce. It’s also a lovely complement to fresh salads, tomatoes, mozzarella cheese, and pizza.
Beyond the kitchen, Genovese Basil is sometimes used for its aromatic properties in infused oils and vinegars. It’s also an attractive plant for pollinators when allowed to flower, making it as beneficial for the garden ecosystem as it is for the dinner table. Whether it’s the cornerstone of a pesto or a fresh accent to a summer dish, Genovese Basil’s robust flavor and fragrant leaves are treasures sought after by chefs and gardeners alike.
Growing Genovese Basil:
- Planting: Genovese Basil thrives in warm, stable climates and should be planted after the last threat of frost has passed. Select a sunny spot that receives at least 6 hours of sunlight per day. The soil should be rich, moist, and well-draining, with a pH between 6.0 and 7.0.
- Sowing Herb Seeds: Plant the seeds indoors 4-6 weeks before the last spring frost, or directly outside once temperatures are consistently above 50°F (10°C). Cover the seeds with a thin layer of soil. Thin the seedlings or space them 8-10 inches apart to allow for full, bushy plant development.
Caring for Genovese Basil:
- Watering: Water the basil plants evenly to keep the soil consistently moist but not soggy. Avoid getting water on the leaves to reduce the risk of disease.
- Feeding: Apply a balanced, all-purpose liquid fertilizer or compost tea every 4 weeks to promote healthy growth.
- Pruning: Pinch off the tips of the plants when they are 6-8 inches tall to encourage a bushier growth and prevent early flowering. Regularly remove any flowers that appear.
- Pest Management: Keep an eye out for pests such as aphids and spider mites. Use organic pest control methods to manage infestations.
Harvesting Genovese Basil:
- When to Harvest: Begin to harvest Genovese Basil when the plant has at least 6 leaves and is 6-8 inches tall. This encourages the plant to grow fuller.
- How to Harvest: Pick leaves in the morning when their essential oils are at their peak. Snip leaves or stems with scissors, being careful not to damage the main stems.
Preserving Genovese Basil:
- Refrigeration: For short-term storage, wrap the basil leaves in a damp paper towel and store them in a plastic bag in the refrigerator.
- Freezing: Blanch the leaves for 2 seconds in boiling water, plunge into ice water, then pat dry and freeze flat on a baking sheet before transferring to a freezer bag. Alternatively, puree the leaves with olive oil and freeze in ice cube trays.
- Drying: Hang bunches of basil upside down in a warm, dry, and well-ventilated area out of direct sunlight. Once dried, store the leaves whole or crumbled in an airtight container.
- Making Pesto: Genovese Basil is perfect for making pesto. Blend the fresh leaves with pine nuts, garlic, Parmesan cheese, and olive oil, and freeze the pesto in small jars or ice cube trays.
With these steps, you can enjoy the fresh taste of Genovese Basil throughout the growing season and preserve it for use in your favorite recipes year-round.
Seed Saving For The Future: Here’s an expert guide on how to harvest and store seeds from Genovese Basil (Ocimum basilicum ‘Genovese’), incorporating effective techniques for optimal seed quality and preservation:
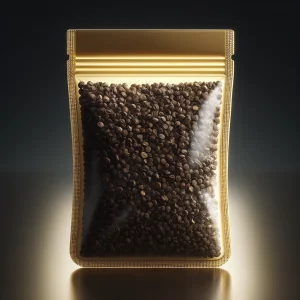
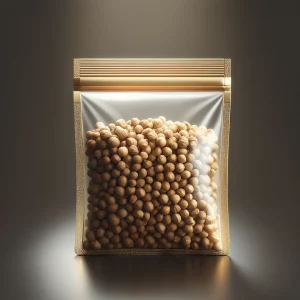
Basil Genovese with Liqui-Dirt Seed Vault Storage Pouch
Tools Needed:
- Scissors or garden shears
- Liqui-Dirt Seed Preservation Pouch
- Paper Bag
- A fine mesh sieve
- Container or bowl
Steps to Harvest Genovese Basil Seeds:
1. Identifying Seed Heads:
- Timing: Start monitoring your Genovese Basil as it begins to flower. Ideal seed harvesting time is when the flower spikes have turned brown and the seed heads are dry. This typically occurs in late summer to early fall, depending on your growing conditions.
- Visual Inspection: Look for flower spikes where the seeds are housed in tiny, dried brown husks clustered together at the top of the stems.
2. Collecting Seed Heads:
- Cutting: Use scissors or garden shears to snip off the flower spikes that contain the mature seed heads.
- Handling: Carefully place these spikes into a paper bag to catch any seeds that might fall out as the heads dry further.
3. Drying the Seed Heads:
- Environment: Ensure the seed heads are kept in a warm, dry place with ample air circulation. This is crucial for complete drying and ease of seed extraction.
- Preparation for Seed Removal: The seed heads should be completely dry and brittle to the touch, ready to crumble upon handling.
4. Extracting the Seeds:
- Shaking: Vigorously shake the dried flower spikes inside the bag or over a bowl to loosen the seeds from their husks.
- Sieving: Use a fine mesh sieve to sift the seeds from the husks and other debris into a bowl. This helps to ensure only the seeds are collected.
5. Storing the Seeds:
- Labeling: Utilize the Liqui-Dirt Seed Preservation Pouch for storing your seeds. This specialized pouch is already labeled for your convenience.
- Storage Conditions: Store the seeds in the Seed Vault main pouch in a cool, dry environment to maintain their viability and protect them from moisture.
Additional Tips:
- Plant Health: Only harvest seeds from the healthiest and most robust Genovese Basil plants to guarantee the highest quality seeds for your next planting.
- Pest Control: Inspect the seed heads for any signs of insect damage or disease before collecting and drying them.
- Seed Testing: To check seed viability, you can perform a simple germination test by planting a few seeds in moist soil and observing if they sprout.
Reminder:
- Reordering Seeds: Remember to restock your seed supply by ordering from Liqui-Dirt Organic Nursery and Garden at least four weeks before your next planting season begins.
By meticulously following these steps, you can successfully harvest and preserve high-quality seeds from your Genovese Basil plants, ensuring that you have excellent seeds for next season’s garden or for culinary use.
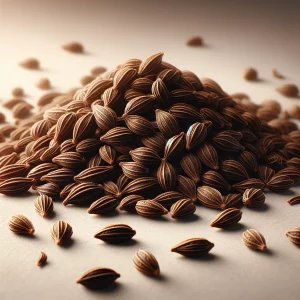
Caraway Herb Seeds ready for planting
Caraway Herb Seeds, with its scientific name Carum carvi, is a biennial herb that has woven its way through history, tracing back to the Stone Age with evidence of its use found in archaeological sites. Esteemed in ancient Rome for its digestive properties, it was also tucked away in the tombs of Egyptian pharaohs and later embraced throughout Europe for its medicinal virtues.
The flavor profile of caraway is complex and unmistakable, marked by a sharp, warm spiciness with a hint of peppery citrus. Its seeds, which are actually the dried fruit of the plant, are highly aromatic and possess an earthy anise flavor that becomes more pronounced when toasted.
Caraway herb seeds unique characteristics include its delicate, feathery leaves and umbrella-like clusters of small, white to pink flowers. The crescent-shaped seeds are what most commonly define caraway, setting it apart from similar-looking plants like fennel and cumin.
As a biennial, caraway herb seed spends its first growing season developing foliage and storing energy, and in the second season, it blooms and sets seeds. Once established, it can tolerate cold temperatures, making it versatile for various growing climates.
In culinary uses, caraway herb seeds are a staple in European bread, like rye and pumpernickel, and are used in sausages, sauerkraut, and a range of traditional dishes like Hungarian goulash. Beyond the kitchen, caraway herb seeds are employed in the distillation of some liqueurs and spirits, such as aquavit and kummel. The leaves and roots are also edible; the leaves can garnish salads and soups, while the roots can be cooked as a vegetable, similar to parsnips.
Caraway herb seeds are reputed to aid digestion, and the essential oil extracted from them is used in pharmaceuticals and perfumery. The herb seeds are also believed to have carminative properties, helping to relieve digestive gas. Whether in herb seed, leaf, or root form, caraway herb seeds adds depth and diversity to a multitude of culinary creations and has earned its place in the pantry as well as in natural remedy kits.
Growing Caraway:
- Planting: Caraway herb seeds is best sown directly into well-drained, fertile soil with a pH of 6.0 to 7.5. Choose a site with full sun to partial shade. Since caraway herb seeds are a biennial, it will form foliage the first year and flower and set seeds the second year.
- Sowing: Plant herb seeds in the late spring or early summer, about ½ inch deep and 2 inches apart in rows that are 12 to 18 inches apart. Germination can be slow and uneven, but once the seedlings have emerged, thin them to stand 6 to 8 inches apart.
Caring for Caraway herb seeds:
- Watering: Water the plants regularly to keep the soil evenly moist. Caraway herb seeds has deep roots that make it somewhat drought-tolerant, but it will benefit from consistent watering during dry spells.
- Weeding: Keep the area around the caraway herb seeds and plants weed-free, especially when they are young. Mulching can help to retain soil moisture and suppress weeds.
- Feeding: Caraway generally does not require much fertilizer, especially if planted in fertile soil. If necessary, a balanced organic fertilizer can be applied.
- Supporting: In its second year, caraway may require staking as the plants grow taller and become top-heavy with seeds.
Harvesting Caraway:
- Herb Seeds Harvest: Wait for the second season when the seed heads turn brown and the seeds ripen to a tan color. Harvest the seed heads on a dry day by cutting them off with a length of stem attached.
- Leaf Harvest: Caraway leaves can be harvested in the first year once the plant is well established. Pick the young leaves as needed for fresh use. Preserving Caraway:
- Drying Herb Seeds: Tie the harvested seed heads in bunches and hang them upside down in a dry, warm, well-ventilated area, with a container underneath to catch falling seeds. Once dry, thresh the seeds by rubbing them between your hands over a bowl. Store the cleaned seeds in an airtight container in a cool, dark place.
- Drying Leaves: If you wish to preserve the leaves, they can be dried by laying them out in a thin layer on a drying screen or hanging them in bunches. Store dried leaves in a sealed container away from light.
- Freezing: Caraway leaves can be frozen by chopping them and placing them in an airtight container or freezing them in water in ice cube trays.
- Infusing: Caraway herb seeds can also be used to infuse vinegar or oil. Place the seeds in a clean jar, cover with vinegar or oil, and let it sit in a cool, dark place for a few weeks before straining.
By following these steps, you can enjoy the distinctive flavor of caraway from your garden year-round.
Seed Saving For The Future: Here’s a detailed guide on how to harvest and store seeds from Caraway (Carum carvi), utilizing efficient techniques to ensure you collect high-quality seeds for future planting:
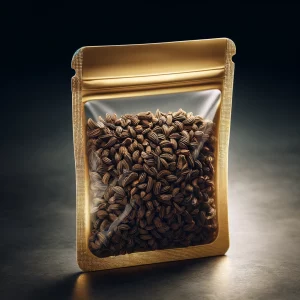
Caraway with Liqui-Dirt Seed Vault Storage Pouch
Tools Needed:
- Scissors or garden shears
- Liqui-Dirt Seed Preservation Pouch
- Paper Bag
- A fine mesh sieve
- Container or bowl
Steps to Harvest Caraway Seeds:
1. Identifying Seed Heads:
- Timing: Monitor your caraway plants as they mature; the ideal time for seed harvesting is when the seed heads have turned brown, indicating that the seeds are ripe. This typically happens in late summer.
- Visual Inspection: Look for the characteristic seed heads, which appear as umbrella-like clusters (umbels) of tiny, brown seeds.
2. Collecting Seed Heads:
- Cutting: Use scissors or garden shears to cut the stems with the mature umbels. Be sure to choose only the driest and brownest heads to ensure the seeds are fully mature.
- Handling: Carefully place these stems into a paper bag to collect the seeds as the heads dry further and to prevent any seeds from being lost.
3. Drying the Seed Heads:
- Environment: Keep the collected seed heads in a warm, dry area with good air circulation to finish drying. This is crucial for easing the seed extraction process.
- Preparation for Seed Removal: The seed heads should be completely dry and should easily crumble when handled, indicating that they are ready for seed extraction.
4. Extracting the Seeds:
- Shaking: Shake the dried stems vigorously inside the bag or over a bowl to release the seeds from the umbels.
- Sieving: Use a fine mesh sieve to sift the seeds away from the rest of the plant material. This will help to collect clean seeds by allowing them to fall through while larger debris is retained.
5. Storing the Seeds:
- Labeling: Use the Liqui-Dirt Seed Preservation Pouch for effective storage; this pouch is already labeled for your convenience.
- Storage Conditions: Store the cleaned seeds in the Seed Vault main pouch, ensuring they are kept in a cool, dry place to maintain viability and protect against moisture.
Additional Tips:
- Plant Health: Harvest seeds from the healthiest caraway plants to promote strong growth in the next generation.
- Pest Control: Examine the seed heads for pests or disease before collecting them, and do not use any that are compromised.
- Seed Testing: To assess the viability of the seeds, you can perform a germination test by planting a few seeds in moist soil and checking for sprouting.
Reminder:
- Reordering Seeds: To prepare for the next growing season, make sure to order new seeds from Liqui-Dirt Organic Nursery and Garden at least four weeks before you plan to sow.
By following these steps, you can efficiently harvest and securely store your Caraway seeds, ensuring that you have a robust stock for future planting or culinary uses.
Chamomile Herb Seeds ready for planting
German Chamomile, scientifically known as Matricaria recutita, is an annual herb cherished throughout history for its therapeutic properties. Often confused with its perennial cousin Roman Chamomile, German Chamomile has been a staple in traditional medicine since ancient Egyptian times, where it was dedicated to the gods for its healing qualities. It was also favored in medieval Europe and has since been adopted globally for its wide range of health benefits.
Distinct from other herbs due to its delicate, apple-like fragrance, German Chamomile has a subtle, sweet, and herbaceous flavor profile. This makes it a popular choice for calming teas and soothing infusions. Its daisy-like flowers, with white petals encircling a yellow conical center, are the primary source of its flavorful and medicinal bounty.
Unique among herbs for its high levels of chamazulene, German Chamomile exhibits a strong anti-inflammatory property once the flowers are distilled into oil. This essential oil is a deep, inky blue, a characteristic testament to its potency and the presence of chamazulene which forms during the distillation process.
In addition to its use in herbal teas, German Chamomile is also utilized in the culinary world, though less frequently than other herbs. It can impart a gentle bitterness to light desserts or be steeped in milk or cream for dishes that benefit from its aromatic qualities.
The uses of German Chamomile extend well beyond its flavor. It is a gentle remedy for sleeplessness and anxiety, used in aromatherapy for relaxation, and in skincare products for its soothing effect on the skin. It is also employed in hair care to enhance blonde tones and impart a luminous shine. Renowned for its versatility, German Chamomile continues to be a treasured natural remedy and a delightful addition to any herb garden.
Growing German Chamomile:
- Planting: German Chamomile prefers a sunny location and well-drained soil. It’s tolerant of poor soil conditions and somewhat drought-resistant once established. You can start seeds indoors 6 to 8 weeks before the last frost date or sow them directly into the garden in early spring. The seeds need light to germinate, so scatter them on the soil surface and press them down gently, without covering them with soil.
- Sowing: Space the seeds or seedlings about 8 to 10 inches apart. This spacing allows adequate air circulation, which is vital for preventing fungal diseases.
Caring for German Chamomile:
- Watering: Water the plants regularly to keep the soil moist until they are established. Once mature, chamomile plants require less water and will only need attention during prolonged dry spells.
- Feeding: German Chamomile doesn’t generally need fertilizing; too much fertilizer can actually reduce the strength of the flowers’ fragrance and flavor. If your soil is extremely poor, a light feeding of balanced, organic fertilizer at planting time will suffice.
- Weeding: Keep the area around the plants weed-free, especially when they’re young, to reduce competition for nutrients and water.
- Pest Management: Chamomile is not typically bothered by pests, but it can occasionally suffer from aphids or thrips. These can be managed with a strong blast of water or organic insecticidal soap.
- Harvesting German Chamomile:
- Timing: Harvest the flowers when they are fully open, before the petals begin to fall back. The best time to pick them is in the morning after the dew has dried and before the sun is at its hottest to ensure the best flavor and medicinal qualities.
- Method: Snip the flower heads off the stems or pinch them off between your thumb and forefinger.
Preserving German Chamomile:
- Drying herb seeds: Lay the flower heads out on a clean screen or hang them in bunches in a warm, dry, well-ventilated location away from direct sunlight. When the flowers are completely dry, store them in an airtight container in a cool, dark place.
- Freezing: You can also preserve chamomile flowers by freezing them. Spread the flower heads on a tray in a single layer and freeze them. Once frozen, transfer the flowers to a sealed bag or container and keep them in the freezer.
- Making Teas or Infusions: One of the simplest ways to preserve chamomile is to use it in teas or infusions. You can create a strong infusion by steeping the flowers in hot water, then straining and freezing the liquid in ice cube trays.
By following these steps, you’ll be able to grow, care for, harvest, and preserve German Chamomile effectively, enjoying its soothing qualities all year round.
Seed Saving For The Future: Here’s a detailed guide on how to harvest and store seeds from Chamomile (Matricaria chamomilla), utilizing effective methods to ensure high-quality seeds for future planting:
Chamomile with Liqui-Dirt Seed Vault Storage Pouch
Tools Needed:
- Scissors or garden shears
- Liqui-Dirt Seed Preservation Pouch
- Paper Bag
- A fine mesh sieve
- Container or bowl
Steps to Harvest Chamomile Seeds:
1. Identifying Seed Heads:
- Timing: Monitor your chamomile plants as the growing season progresses. The best time for seed harvesting is when the flowers have matured and the white petals have fallen off, leaving behind the round, dry flower heads. This typically occurs in late summer.
- Visual Inspection: Look for the dried flower heads that are brown and papery; these contain the seeds.
2. Collecting Seed Heads:
- Cutting: Use scissors or garden shears to carefully cut the flower stalks that have mature, dry heads.
- Handling: Place these stalks gently into a paper bag. This will help catch any seeds that might fall out as the heads dry further.
3. Drying the Seed Heads:
- Environment: Store the seed heads in a warm, dry place with good air circulation to ensure complete drying. Adequate drying is essential for easy seed extraction.
- Preparation for Seed Removal: The seed heads should be completely dry and should crumble easily when handled.
4. Extracting the Seeds:
- Shaking: Vigorously shake the dried stalks inside the bag or over a bowl to release the seeds from the flower heads.
- Sieving: Use a fine mesh sieve to separate the seeds from the dried flower parts. Sift over a bowl, allowing the small seeds to fall through while retaining larger debris.
5. Storing the Seeds:
- Labeling: Employ the Liqui-Dirt Seed Preservation Pouch for storage, which comes pre-labeled for your convenience.
- Storage Conditions: Keep the seeds in the Seed Vault main pouch in a cool, dry place to preserve viability and protect them from moisture.
Additional Tips:
- Plant Health: Harvest seeds from the healthiest chamomile plants to ensure robust future crops.
- Pest Control: Check the flower heads for any signs of pest damage or disease before and after drying, and avoid using compromised materials.
- Seed Testing: Conduct a germination test by planting a few seeds in moist soil to verify their viability.
Reminder:
- Reordering Seeds: Ensure continuous cultivation by ordering new seeds from Liqui-Dirt Organic Nursery and Garden at least four weeks before the next planting season.
By following these carefully outlined steps, you can effectively harvest and securely store your Chamomile seeds, making sure you have quality seeds ready for the next growing season or for herbal uses.
Chervil Herb Seeds ready for planting
Curled Chervil, Anthriscus cerefolium, is a refined herb with a heritage as rich as its flavor. Sometimes known as garden chervil or French parsley, it has been seasoned into European culinary traditions since classical times, cherished by the Romans for both its taste and supposed medicinal qualities. This delicate herb graced the tables of French nobility, becoming one of the essential fines herbes of French cuisine.
Curled Chervil’s flavor is subtle yet distinctive, with a faint taste akin to licorice or aniseed, complemented by a slight peppery warmth. It is milder than its flat-leaf cousin, with a gentle hint of parsley, making it an exquisite addition to light and refined dishes.
Visually, Curled Chervil is notable for its intricately curled leaves, which lend an elegant appearance to any dish they adorn. These lacy, light green leaves are not just for garnish; they contain various nutrients and have a higher surface area, which allows their delicate aroma to be released more readily.
In the garden, Curled Chervil is a cool-season crop, preferring the milder days of spring and autumn. It grows swiftly and is an ideal candidate for succession planting. It is less well-known than many herbs, which often makes it a topic of delightful discovery for culinary enthusiasts and gardeners alike.
In terms of uses, Curled Chervil is most often used fresh, as cooking quickly dissipates its delicate flavor. It is a classic ingredient in omelets, soups, and salads, and pairs beautifully with eggs, seafood, and young spring vegetables like peas and carrots. Chervil also makes a refreshing addition to soft cheeses and butter, creating flavorful spreads or compound butters. Its fresh leaves are sometimes used to infuse vinegars or oils, which subtly impart their flavor into dressings and marinades.
Though not as widely known as other herbs, Curled Chervil offers a touch of elegance and a hint of gourmet sophistication to both gardens and dishes alike, making it a cherished, if somewhat secret, culinary treasure.
Growing Curled Chervil:
- Planting: Curled Chervil thrives in cool conditions and can be planted as early as the soil can be worked in spring. It prefers a shaded or partly shaded spot, especially in regions where summers are warm. The soil should be well-draining and rich in organic matter with a pH of 6.0 to 6.7.
- Sowing: Since Chervil seeds are light sensitive, sow them directly into the soil at a shallow depth of about 1/4 inch and cover lightly with soil. Space the seeds or thin seedlings to about 8 inches apart to allow for their delicate foliage to spread.
Caring for Curled Chervil:
- Watering: Keep the soil consistently moist but not waterlogged. Curled Chervil requires regular watering, especially in dry conditions, to maintain its delicate leaves.
- Feeding: Apply a light application of a balanced organic fertilizer at planting and perhaps a mid-season boost if the plants seem sluggish or the leaves pale.
- Weeding: Keep the area around chervil free from weeds, which can compete with the fine roots for nutrients and water.
- Pest Management: Curled Chervil is generally pest-resistant but watch for slugs and snails, especially in damp, shaded gardens.
- Harvesting Curled Chervil:
- Timing: Harvest chervil when the plants are about 4 to 6 inches tall, which typically takes around 6-8 weeks from sowing. The leaves are best when harvested before the plant starts flowering, as the flavor can become more bitter after flowering begins.
- Method: Cut the leaves gently with scissors, selecting from the outside of the plant to encourage further growth from the center. Regular harvesting can help prolong the life of the plant.
Preserving Curled Chervil:
- Refrigerating: Fresh chervil can be stored in the refrigerator for a short period. Wrap the leaves in a damp paper towel and place them in a plastic bag in the refrigerator’s crisper drawer.
- Freezing: Chervil can be frozen by chopping the leaves finely, placing them in an ice cube tray, covering them with water, and freezing. These chervil ice cubes can be added directly to soups and sauces.
- Drying Herb Seeds: Drying is not typically recommended for chervil as it loses much of its flavor. However, if you choose to dry it, hang bunches in a warm, airy place away from direct sunlight. Once dried, store in an airtight container.
- Using in Recipes: Due to its delicate nature, chervil is best used fresh. It can be added at the last moment to dishes such as soups, salads, and omelets to retain its flavor.
By following these steps, you can successfully grow, care for, and utilize curled chervil in your culinary adventures, enjoying its subtle, refined flavor to enhance a variety of dishes.
Seed Saving For The Future: Here’s a thorough guide on how to harvest and store seeds from Curled Chervil (Anthriscus cerefolium), using best practices to ensure you gather high-quality seeds for your next planting season:

Chervil with Liqui-Dirt Seed Vault Storage Pouch
Tools Needed:
- Scissors or garden shears
- Liqui-Dirt Seed Preservation Pouch
- Paper Bag
- A fine mesh sieve
- Container or bowl
Steps to Harvest Curled Chervil Seeds:
1. Identifying Seed Heads:
- Timing: Start observing your Curled Chervil plants as they begin to flower and mature. Seed harvesting should commence when the seed heads turn brown, indicating that the seeds are ripe. This generally happens in late summer.
- Visual Inspection: Look for the small, umbrella-like clusters (umbels) of seed heads that are typical of the chervil plant.
2. Collecting Seed Heads:
- Cutting: Use scissors or garden shears to carefully cut the stalks that hold the mature seed heads.
- Handling: Gently place these stalks into a paper bag to catch any seeds that might fall out as the seed heads continue to dry.
3. Drying the Seed Heads:
- Environment: Ensure that the seed heads are kept in a warm, dry place with plenty of air circulation to aid in drying.
- Preparation for Seed Removal: The seed heads need to be completely dry and should easily break apart when touched.
4. Extracting the Seeds:
- Shaking: Shake the dried stalks vigorously inside the bag or over a bowl to release the seeds from the umbels.
- Sieving: Use a fine mesh sieve to sift the seeds, allowing them to fall into a bowl while keeping larger plant debris out.
5. Storing the Seeds:
- Labeling: Use the Liqui-Dirt Seed Preservation Pouch for storage; it is pre-labeled for convenience.
- Storage Conditions: Place the seeds in the Seed Vault main pouch and store in a cool, dry place to maintain their viability and protect them from moisture.
Additional Tips:
- Plant Health: Always select seeds from the healthiest plants to ensure good genetics for future crops.
- Pest Control: Inspect the seed heads for any signs of insect infestation or disease before harvesting them.
- Seed Testing: To test the viability of the seeds, try germinating a few in moist soil to see if they sprout effectively.
Reminder:
- Reordering Seeds: To prepare for the next growing season, remember to order new seeds from Liqui-Dirt Organic Nursery and Garden at least four weeks before you plan to sow.
By adhering to these steps, you can efficiently harvest and securely store your Curled Chervil seeds, guaranteeing that you have high-quality seeds ready for planting or culinary use in the upcoming season.
Chives Herb Seeds ready for planting
Chives herb Seeds, scientifically known as Allium schoenoprasum, are a perennial herb and the smallest species of the edible onion family. They have been cultivated across Europe and Asia for thousands of years, with historical records indicating their use in cuisine and medicine by the ancient Greeks and Romans. They were prized not only for their culinary applications but also for their properties as a natural insect repellent.
Chives are characterized by their mild, onion-like flavor, with a hint of garlic, making them a subtler alternative to their more robust allium relatives. Their delicate, grass-like leaves are hollow and tubular, emerging early in the spring from small, bulbous rhizomes. During the summer months, chives produce attractive, round, purple flowers, which are also edible and offer a slightly stronger onion flavor compared to the leaves.
Unique in their nutritional profile, chives are rich in vitamins A and C, and contain trace amounts of sulfur and iron. They are known for their beneficial effects on the circulatory system and have been used traditionally to boost digestion and enhance the immune system.
In the kitchen, chives are incredibly versatile. They are most commonly used as a garnish, adding a fresh, mild onion flavor to salads, soups, potato dishes, and omelets. Their bright green color also makes them an attractive topping for creamy sauces and dips, such as sour cream or butter-based preparations. Beyond their role as a garnish, chives can be blended into herb butters, infused into vinegars, and mixed into soft cheeses or spreads.
Chives are also appreciated in the garden. They are hardy and easy to grow, making them a favorite among beginner gardeners. They can be planted in flower beds as an ornamental plant or used functionally in vegetable gardens to deter pests with their pungent scent.
Overall, chives blend seamlessly into a wide array of culinary dishes, bringing a subtle touch of depth and flavor. Their ease of cultivation and the beauty of their purple flowers add aesthetic and practical value to any garden.
Growing Chives:
- Planting: Chives thrive in a sunny location with well-draining soil, though they can tolerate partial shade. The soil should be fertile and rich in organic matter with a pH between 6.0 and 7.0. You can start chives from seed indoors 8-10 weeks before the last spring frost or plant them directly outdoors in early spring or autumn.
- Sowing Herb seeds: If starting chives from herb seed, sow them ¼ inch deep. Herb Seeds can take up to two weeks to germinate. For quicker results, consider planting chive divisions or nursery starts. Space plants or clumps about 8-12 inches apart to give them room to clump and spread.
Caring for Chives:
- Watering: Chives need regular watering to keep the soil moist but not soggy. Once established, they are relatively drought-tolerant but will produce the best growth with consistent moisture.
- Feeding: Apply a balanced, slow-release fertilizer in the spring and perhaps a light feeding in the summer to promote vigorous growth. Chives are not heavy feeders, so avoid over-fertilizing.
- Weeding: Keep the area around chives free of weeds, which can compete for nutrients and water.
- Pest Management: Chives are generally resistant to pests, but keep an eye out for common issues like aphids. If pests appear, they can usually be managed with a strong spray of water or insecticidal soap.
Harvesting Chives:
- Timing: You can begin harvesting chive leaves as soon as they are tall enough to clip, about 6 inches. Regular cutting encourages thicker growth.
- Method: Use scissors to cut the chive leaves about 1-2 inches above the base. This method encourages new leaves to grow and maintains a tidy plant. Never remove more than one-third of the foliage at one time.
- Preserving Chives:
- Freezing: Chives can be finely chopped and frozen in an airtight container or bag. Alternatively, chop them and freeze them in ice cube trays with water or olive oil, which can then be added directly to cooking dishes.
- Drying Herb Seeds: Chives can be dried, though they lose some of their flavor this way. Hang them in bunches in a warm, well-ventilated area or use a food dehydrator. Once dry, store the chives in an airtight container.
- Refrigerating: Fresh chives can be stored in the refrigerator for up to a week. Wrap them in a damp paper towel and place them in a plastic bag. Chives are easy to grow and maintain, making them a perfect addition to any garden.
With regular harvesting, they will continue to produce fresh growth throughout the growing season, providing a steady supply of this versatile herb.
Seed Saving For The Future: Here’s a comprehensive guide on how to harvest and store seeds from Chives (Allium schoenoprasum), using effective techniques to ensure the best quality seeds for your gardening needs:
Chives with Liqui-Dirt Seed Vault Storage Pouch
Tools Needed:
- Scissors or garden shears
- Liqui-Dirt Seed Preservation Pouch
- Paper Bag
- A fine mesh sieve
- Container or bowl
Steps to Harvest Chives Seeds:
1. Identifying Seed Heads:
- Timing: Begin observing your chive plants as they flower and mature. The optimal time to harvest seeds is when the flower heads have turned brown and the seeds within are dry. This usually occurs in late summer.
- Visual Inspection: Look for the spherical seed heads that form at the top of the stems, which turn from a vibrant purple to a dull, dry brown as they mature.
2. Collecting Seed Heads:
- Cutting: Use scissors or garden shears to snip the flower stems that have mature, dry seed heads.
- Handling: Carefully place these stems into a paper bag to catch any seeds that might fall as the heads continue to dry further.
3. Drying the Seed Heads:
- Environment: Store the seed heads in a warm, dry place with good air circulation. Proper drying is crucial for easy seed extraction.
- Preparation for Seed Removal: The seed heads should be completely dry and should easily crumble when handled.
4. Extracting the Seeds:
- Shaking: Vigorously shake the dried stems inside the bag or over a bowl to loosen the seeds from the seed heads.
- Sieving: Use a fine mesh sieve to filter out the seeds, allowing them to fall into a bowl while keeping larger debris on top.
5. Storing the Seeds:
- Labeling: Utilize the Liqui-Dirt Seed Preservation Pouch for storage. This pouch is pre-labeled for your convenience.
- Storage Conditions: Keep the seeds in the Seed Vault main pouch in a cool, dry place to maintain their viability and protect them from moisture.
Additional Tips:
- Plant Health: Harvest seeds from the healthiest chive plants to ensure vigorous growth in future generations.
- Pest Control: Examine the seed heads for signs of insect damage or disease before and after drying; discard any that are compromised.
- Seed Testing: To assess seed viability, perform a germination test by planting a few seeds in moist soil and checking if they sprout.
Reminder:
- Reordering Seeds: Ensure you have a continuous supply of chive seeds by ordering from Liqui-Dirt Organic Nursery and Garden at least four weeks before the planting season starts.
Following these steps will help you effectively harvest and securely store your Chives seeds, making sure you have quality seeds ready for the next planting season or to enhance your culinary creations.
Cilantro Herb Seeds ready for planting
Cilantro Herb Seeds, also known as coriander or Chinese parsley, is an annual herb beloved and debated over for its distinctive flavor profile. It has been cultivated and used in culinary traditions worldwide for millennia, with roots tracing back to ancient civilizations across the Middle East, Africa, and Asia. Historical records show that cilantro was one of the earliest herbs and spices used by mankind, with references found in Sanskrit texts and ancient Egyptian tombs.
Cilantro’s flavor is often described as fresh and citrusy with hints of peppery, earthy undertones. However, it is famously polarizing due to genetic differences in taste perception; some people adore its vibrant zest, while others find it tastes soapy.
The plant is unique not only for its flavor but also for its dual utility: the soft, feathery green leaves are used as an herb, and the seeds—known as coriander—are used as a spice. This versatility makes cilantro a staple in a variety of cuisines, particularly in Mexican, South Asian, and Middle Eastern dishes.
Cilantro is relatively easy to grow but can be a challenge to keep as it tends to bolt quickly in warm weather, turning to seed and losing its lush leafiness. Its delicate white flowers are also edible and offer a milder cilantro flavor.
In culinary applications, cilantro is almost always used fresh as it loses much of its potent aroma and flavor when dried. The leaves are a common garnish for dishes such as salsas, curries, and salads. Cilantro pairs wonderfully with lime and chili in savory dishes and is essential in guacamole and various chutneys. Its roots, often used in Thai cuisine, are ground into pastes to flavor soups and curries.
Beyond its culinary uses, cilantro has been credited with medicinal properties, including anti-inflammatory and digestive benefits. It contains antioxidants and has been used traditionally to detoxify heavy metals, although these uses are more anecdotal than scientifically proven.
Cilantro’s unmistakable character and multifunctional aspects continue to make it a favorite among chefs and home cooks around the world, enhancing dishes with its bright, pungent flavor.
Dill-Bouquet Herb Seeds ready for planting
Bouquet Dill Herb Seed is a particularly popular variety of dill, known for its abundant yields and highly aromatic qualities. Dill itself is an ancient herb, with a rich history dating back to biblical times and classical antiquity. It was used by the Greeks and Romans not only as a spice but also for its purported medicinal properties, such as its ability to soothe the stomach.
The flavor of Bouquet Dill is distinctly aromatic, with a slightly sweet undertone that complements its more prominent grassy and tangy notes. This combination makes it highly prized in culinary circles. The leaves, known as dill weed, are delicate and fernlike, offering a soft texture that is perfect for culinary use. The seeds, which are produced abundantly in Bouquet Dill, are stronger in flavor and are often used in pickling or as a spice in cooking.
Bouquet Dill’s unique characteristics include its tall and slender stems, which can reach up to three or four feet, topped with broad, flat flower umbels. These umbels add a decorative element to gardens and are attractive to beneficial insects, including pollinators and predatory wasps which help control garden pests.
In culinary uses, Bouquet Dill is extremely versatile. The weed is commonly used fresh in salads, as a garnish, and in dips and sauces. It pairs particularly well with fish, potatoes, and cucumbers. Dill seeds are used in baking, in pickles, and to flavor stews and roasted vegetables. The seeds also have traditional uses in herbal medicine, often included in remedies to aid digestion or to combat insomnia.
Additionally, the entire plant, including the seeds, weed, and even the stems, can be used in floral arrangements or as a part of a dried bouquet, lending a fragrant and rustic touch to decorations.
Bouquet Dill stands out as a garden herb for its ease of growth, its decorative and culinary uses, and its attractive appearance, making it a favorite among gardeners and chefs alike.
Growing Bouquet Dill:
- Planting: Bouquet Dill prefers a sunny location with well-drained soil. It’s a good idea to mix in some compost or aged manure before planting to enrich the soil. Dill seeds should be sown directly into the ground in the spring after the risk of frost has passed, as it doesn’t transplant well due to its long taproot.
- Sowing Herb Seeds: Plant the herb seeds 1/4 inch deep and 18 inches apart. You can sow herb seeds every few weeks into midsummer to ensure a continuous supply. Dill germinates best at temperatures between 60-70°F (15-21°C).
Caring for Bouquet Dill:
- Watering: Water the plants regularly, especially during dry spells, to keep the soil moist but not soggy. Dill does not like standing water.
- Feeding: Bouquet Dill generally does not require additional feeding; however, if your soil is very poor, a light application of a balanced fertilizer at the beginning of the season can help.
- Weeding: Keep the area around the dill free from weeds. Mulching can help retain moisture and suppress weeds.
- Pest Management: Watch out for aphids and spider mites. These pests can be controlled with a strong jet of water or by using organic insecticidal soap.
Harvesting Bouquet Dill:
- Leaves (Dill Weed): Harvest the feathery leaves as needed by snipping them close to the stem. For the best flavor, harvest in the morning or evening. You can begin harvesting leaves when the plant is about 8 inches tall.
- Herb Seeds: Harvest the herb seeds when the flower heads turn brown and the seeds give off a strong dill scent. Cut the flower heads and hang them upside down in a paper bag to catch the herb seeds as they dry and fall off.
- Preserving Bouquet Dill:
- Drying: To dry the leaves, hang them in bunches in a well-ventilated, dark, and dry place. Once dried, crumble the leaves and store them in an airtight container. For seeds, after harvesting, let them dry thoroughly before storing in airtight containers.
- Freezing: Dill leaves freeze well. Chop the leaves and pack them into ice cube trays with water, or freeze them in a thin layer on a baking sheet before transferring to a freezer bag.
- Refrigerating: Fresh dill can be stored in the refrigerator for about 1-2 weeks. Wrap the stems in a damp paper towel and place them in a plastic bag.
Growing Bouquet Dill is straightforward and rewarding, offering both culinary versatility and an attractive addition to the garden. With proper care, you can enjoy the fresh taste of dill throughout the growing season and preserve it for use in the kitchen all year round.
Seed Saving For The Future:Here’s a comprehensive guide on how to harvest and store seeds from Bouquet Dill (Anethum graveolens ‘Bouquet’), utilizing best practices to ensure you collect high-quality seeds for your next planting:

Dill-Bouquet with Liqui-Dirt Seed Vault Storage Pouch
Tools Needed:
- Scissors or garden shears
- Liqui-Dirt Seed Preservation Pouch
- Paper Bag
- A fine mesh sieve
- Container or bowl
Steps to Harvest Bouquet Dill Seeds:
1. Identifying Seed Heads:
- Timing: Monitor your Bouquet Dill as it matures; the ideal time for seed harvesting is when the seed heads have dried on the plant and the seeds have turned a brownish color. This typically happens in late summer.
- Visual Inspection: Look for the umbrella-like clusters (umbels) at the top of the plant. These umbels will contain the mature seeds.
2. Collecting Seed Heads:
- Cutting: Use scissors or garden shears to carefully cut the flower stalks that have mature, dry seed heads.
- Handling: Place these stalks into a paper bag to catch any seeds that might fall as the seed heads dry further.
3. Drying the Seed Heads:
- Environment: Ensure that the seed heads are kept in a warm, dry area with good air circulation to promote further drying.
- Preparation for Seed Removal: The seed heads should be completely dry and brittle to the touch, which indicates that they are ready for seed extraction.
4. Extracting the Seeds:
- Shaking: Vigorously shake the dried stalks inside the bag or over a bowl to loosen the seeds from the umbels.
- Sieving: Use a fine mesh sieve to sift the seeds, separating them from any plant debris and chaff.
5. Storing the Seeds:
- Labeling: Use the Liqui-Dirt Seed Preservation Pouch for storage; this pouch is pre-labeled for your convenience.
- Storage Conditions: Store the seeds in the Seed Vault main pouch in a cool, dry place to ensure their viability and protect them from moisture.
Additional Tips:
- Plant Health: Select seeds from the healthiest and most vigorous Bouquet Dill plants to ensure the best quality seeds for future planting.
- Pest Control: Carefully inspect the seed heads for any signs of pests or disease before collecting them. Avoid using any seeds from diseased or pest-infested plants.
- Seed Testing: To test the viability of the seeds, perform a germination test by planting a few seeds in moist soil and checking if they sprout.
Reminder:
- Reordering Seeds: Remember to reorder your seeds from Liqui-Dirt Organic Nursery and Garden at least four weeks before the planting season to ensure you are fully prepared.
By following these steps, you can effectively harvest and securely store your Bouquet Dill seeds, maintaining high-quality seeds ready for planting or culinary use in the upcoming season.
Dill-Mammoth Herb Seeds ready for planting
Mammoth Dill Herb Seeds, known for its towering stature and robust yields, is a cultivar of the common dill plant, Anethum graveolens. Historically, dill has been cultivated for thousands of years, dating back to ancient Egyptian times where it was used as a medicinal herb and a culinary spice. The Greeks and Romans also valued dill highly, both for its flavor and its purported therapeutic properties.
Mammoth Dill is distinctive for its large size, as it can grow up to 4-5 feet tall, making it one of the tallest dill varieties. Its leaves are lush and feathery, and the plant produces large, flat umbels of yellow flowers that later develop into abundant seeds. This variety is especially favored for its abundant foliage, which is used as a culinary herb, and for its seeds, which are used as a spice.
The flavor of Mammoth Dill is aromatic and somewhat sweet, with a hint of citrus and an underlying grassy note. The seeds are slightly more pungent and bitter than the leaves and are commonly used in pickling recipes.
In the kitchen, Mammoth Dill’s leaves, known as dill weed, are used fresh or dried in a variety of dishes. They are particularly popular in Scandinavian and Eastern European cuisine, featuring prominently in dishes such as gravlax (cured salmon), borscht, and various potato and cucumber salads. The seeds are essential for flavoring pickles and can also be used in bread, soups, and homemade vinegar infusions.
Beyond its culinary uses, Mammoth Dill is also planted as a companion plant in gardens to attract beneficial insects, such as wasps and other predatory insects that help control garden pests. Its tall and striking appearance makes it a decorative addition to the herb garden, where it can also serve as a privacy screen due to its height.
Mammoth Dill combines the aesthetic appeal of an ornamental plant with the practical uses of a culinary herb, making it a versatile and valuable addition to any garden.
Growing Mammoth Dill:
- Planting: Mammoth Dill thrives in full sun and requires well-draining soil enriched with organic matter. Due to its height and deep taproot, it’s best to sow seeds directly into the ground where you want the plant to grow, as it does not transplant well.
- Sowing Herb Seeds: Plant the herb seeds 1/4 inch deep in the soil after the last frost in spring. Space herb seeds or thin seedlings to about 12-18 inches apart to allow for their large growth. Mammoth Dill can also be sown in late summer for a fall harvest.
Caring for Mammoth Dill:
- Watering: Water regularly to keep the soil evenly moist, especially during dry periods. Avoid overwatering, as dill does not like soggy soil.
- Feeding: Apply a general-purpose liquid fertilizer every 4-6 weeks or mix compost into the soil at planting time. Mammoth Dill is not a heavy feeder, so light applications are sufficient.
- Support: Due to its height, Mammoth Dill may require staking in windy areas to prevent the tall stalks from bending or breaking.
- Pest and Disease Management: Keep an eye out for common pests such as aphids. Treat with organic insecticidal soap if necessary. Dill can also be susceptible to fungal diseases if conditions are too wet; ensure good air circulation around the plants to mitigate this risk.
Harvesting Mammoth Dill:
- Leaves (Dill Weed): You can start harvesting the feathery leaves as soon as they are large enough to use. Clip them with scissors close to the stem. Harvesting regularly encourages more growth.
- Herb Seeds: Allow the flower heads to mature and turn brown if you’re harvesting herb seeds. Cut the flower heads and hang them upside down in a warm, dry place inside a paper bag to catch the herb seeds as they fall.
Preserving Mammoth Dill:
- Drying: To dry dill leaves, tie them in small bunches and hang them in a warm, well-ventilated place away from direct sunlight. Once dry, strip the leaves from the stems and store in an airtight container. Seeds should be dried thoroughly after harvesting and stored similarly.
- Freezing: Dill leaves freeze well. Chop the leaves and freeze them in ice cube trays covered with water or stock, which can be added directly to dishes like soups and stews.
- Refrigerating: Fresh dill can be kept in the refrigerator wrapped in a damp paper towel and placed in a plastic bag for a few days.
Growing Mammoth Dill is a rewarding endeavor for any gardener. Its impressive size and abundant production of both leaves and seeds make it a valuable herb for culinary use, while its aromatic presence enhances the garden landscape.
Seed Saving For The Future: Here’s a detailed guide on how to harvest and store seeds from Mammoth Dill (Anethum graveolens ‘Mammoth’), implementing effective methods to ensure you collect the best quality seeds for your gardening projects:
Dill-Mammoth with Liqui-Dirt Seed Vault Storage Pouch
Tools Needed:
- Scissors or garden shears
- Liqui-Dirt Seed Preservation Pouch
- Paper Bag
- A fine mesh sieve
- Container or bowl
Steps to Harvest Mammoth Dill Seeds:
1. Identifying Seed Heads:
- Timing: Watch your Mammoth Dill plants as they mature and flower. The optimal time to harvest seeds is when the seed heads have dried on the plant and the seeds have turned a tan or brownish color. This typically occurs in late summer.
- Visual Inspection: Look for the large umbrella-like clusters (umbels) at the top of the plant, which will contain the mature seeds.
2. Collecting Seed Heads:
- Cutting: Use scissors or garden shears to cut the stalks that have mature, dry seed heads.
- Handling: Gently place these stalks into a paper bag. This will help catch any seeds that may fall out as the seed heads continue to dry and potentially open.
3. Drying the Seed Heads:
- Environment: Keep the seed heads in a warm, dry place with good air circulation to ensure they dry thoroughly.
- Preparation for Seed Removal: The seed heads should be completely dry and brittle, easily crumbling when handled, which indicates they are ready for seed extraction.
4. Extracting the Seeds:
- Shaking: Vigorously shake the dried stalks inside the bag or over a bowl to dislodge the seeds from the umbels.
- Sieving: Use a fine mesh sieve to sift the seeds from the rest of the plant material, ensuring a clean separation.
5. Storing the Seeds:
- Labeling: Use the Liqui-Dirt Seed Preservation Pouch for safe storage; it is pre-labeled for convenience.
- Storage Conditions: Store the seeds in the Seed Vault main pouch in a cool, dry location to maintain their viability and protect them from moisture.
Additional Tips:
- Plant Health: Harvest seeds from the healthiest Mammoth Dill plants to ensure strong and healthy growth in future crops.
- Pest Control: Examine the seed heads for any signs of pest infestations or diseases before and after drying, and avoid using affected materials.
- Seed Testing: To verify seed viability, conduct a germination test by planting a few seeds in moist soil and observing whether they sprout.
Reminder:
- Reordering Seeds: To prepare for the next growing season, be sure to order new seeds from Liqui-Dirt Organic Nursery and Garden at least four weeks before you plan to sow them.
By adhering to these carefully outlined steps, you can successfully harvest and securely store your Mammoth Dill seeds, ensuring that you have high-quality seeds ready for the next planting season or to enhance your culinary dishes.
Echinacea Herb Seeds ready for planting
Echinacea Herb Seeds, also known as coneflower, is a genus of herbaceous flowering plants in the daisy family that is native to North America. Historically, Echinacea has been a staple in traditional Native American medicine for centuries, used to treat a variety of ailments from infections to snakebites. The use of Echinacea spread to other parts of the world in the 18th century, where it became valued for its medicinal properties in Europe as well.
The flavor of Echinacea is distinctively earthy with a slight bitterness, making it less commonly used as a culinary herb and more as a medicinal plant. The most notable characteristic of Echinacea is its striking appearance. The plants feature large, showy heads with pinkish-purple petals and a prominent, spiky central cone that is usually orange or brown. This cone is not only visually distinctive but also rich in pollens and nectar, attracting bees and butterflies to the garden.
Echinacea’s unique attributes extend beyond its visual appeal. It is known for its immune-boosting effects, commonly used to prevent or reduce the symptoms of colds and other respiratory infections. This is largely due to its high content of alkamides, which are thought to enhance immune function.
The plant itself is hardy and drought-resistant, making it a popular choice for gardeners in a variety of climates. It thrives in full sun and well-drained soil and once established, requires minimal care, making it suitable for both beginner gardeners and those looking for low-maintenance landscaping options.
In medicinal use, Echinacea is most commonly administered in the form of teas, tinctures, or capsules. The roots, leaves, and flowers of the plant can all be used, though the roots and flowers are often considered to have the strongest therapeutic effects.
Apart from its health benefits, Echinacea is also used in flower arrangements and as a landscape plant due to its vibrant flowers and general hardiness. Whether used for its beauty or its healing properties, Echinacea continues to be a cherished plant in gardens and health regimens alike.
Growing Echinacea (Coneflower):
- Planting: Echinacea thrives in full sun and well-drained soil. It can tolerate some partial shade, but too much can reduce flowering. The soil should be rich but will do well in average soils too, and slightly acidic to neutral pH is preferred. You can start Echinacea from seed indoors in late winter or directly sow seeds in the ground in spring or fall. When planting seedlings or divisions, space them 1 to 3 feet apart depending on the variety, as some grow larger than others.
- Sowing Herb Seeds: If starting from herb seed, plant the herb seeds 1/4 inch deep. Echinacea herb seeds require light to germinate, so cover them lightly with soil or simply press them into the ground. Germination can take 10-20 days.
Caring for Echinacea:
- Watering: Water the plants evenly to establish them. Once established, Echinacea is quite drought-tolerant, but in prolonged dry spells, additional watering will help plants thrive.
- Feeding: Apply a general-purpose fertilizer in the spring as new growth appears. Echinacea is not a heavy feeder, so additional fertilizing is usually unnecessary.
- Mulching: Mulch around the plants to help retain moisture in the soil, suppress weeds, and provide a clean and dry surface for the lower leaves.
- Pruning: Deadheading (removing spent flowers) encourages additional blooms and prevents the plants from self-seeding excessively, which can lead to overcrowding. In late fall or early spring, cut back the dead stalks to keep the area tidy and to encourage vigorous growth.
- Pest and Disease Management: Echinacea is relatively hardy and not often bothered by pests. However, keep an eye out for aphids and powdery mildew. Good air circulation and proper spacing help prevent disease.
Harvesting Echinacea:
- When to Harvest: For medicinal use, the best time to harvest roots is in the fall of the plant’s third or fourth year. Leaves can be harvested before the plant flowers, and flowers can be collected as they bloom.
- How to Harvest: Dig up roots with a sturdy shovel, taking care not to damage them. Shake off excess soil, then rinse and pat dry. Flowers and leaves should be clipped with scissors or garden shears.
Preserving Echinacea:
- Drying: Clean and chop the roots, then spread them out to dry in a cool, dark, and well-ventilated place. Leaves and flowers can also be dried by hanging in bunches or spreading out on a screen. Once fully dried, store in an airtight container away from light.
- Tinctures and Teas: Dried or fresh Echinacea parts can be used to make tinctures or herbal teas. For teas, steep the dried flowers or leaves in hot water. For tinctures, soak the plant parts in alcohol for several weeks, then strain.
- Storage: Keep dried Echinacea in a cool, dark place in airtight containers. Properly dried and stored, Echinacea can last for several years.
Growing and utilizing Echinacea in your garden can be rewarding not only for its beauty but also for its medicinal properties, providing a rich resource for homemade herbal remedies.
Seed Saving For The Future: Here’s a detailed guide on how to harvest and store seeds from Echinacea (Echinacea spp.), employing proven techniques to ensure you gather the best quality seeds for your gardening efforts:
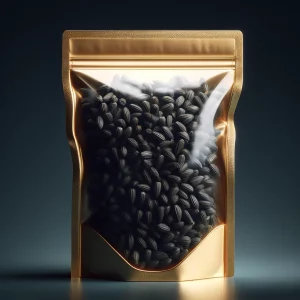
Echinacea with Liqui-Dirt Seed Vault Storage Pouch
Tools Needed:
- Scissors or garden shears
- Liqui-Dirt Seed Preservation Pouch
- Paper Bag
- A fine mesh sieve
- Container or bowl
Steps to Harvest Echinacea Seeds:
1. Identifying Seed Heads:
- Timing: Monitor your Echinacea plants as they mature; the perfect time for seed harvesting is when the flower heads have completely dried and the petals have fallen off. The seeds should be visible, nestled within the spiky central cone of the flower. This usually happens in the late summer or early fall.
- Visual Inspection: Look for the distinctive, dry, and spiky seed cones—these contain the mature seeds.
2. Collecting Seed Heads:
- Cutting: Use scissors or garden shears to carefully cut the flower stalks that hold the mature seed heads.
- Handling: Place these stalks into a paper bag. This helps to catch any seeds that may fall out as the cones continue to dry and open further.
3. Drying the Seed Heads:
- Environment: Ensure the seed heads are stored in a warm, dry place with ample air circulation. Adequate drying is critical for easy seed extraction.
- Preparation for Seed Removal: The seed cones should be completely dry and brittle, making them easy to break apart when handled.
4. Extracting the Seeds:
- Shaking: Vigorously shake the dried stalks inside the bag or over a bowl to loosen the seeds from the cones.
- Sieving: Use a fine mesh sieve to sift the seeds, allowing them to fall into a bowl while keeping the spiky cone debris on top.
5. Storing the Seeds:
- Labeling: Utilize the Liqui-Dirt Seed Preservation Pouch for storage; this pouch is already labeled for your convenience.
- Storage Conditions: Store the seeds in the Seed Vault main pouch in a cool, dry place to maintain their viability and protect them from moisture.
Additional Tips:
- Plant Health: Select seeds from the healthiest Echinacea plants to promote vigorous growth in future generations.
- Pest Control: Inspect the seed cones for any signs of pests or disease before and after drying; discard any that are compromised.
- Seed Testing: To assess seed viability, perform a germination test by planting a few seeds in moist soil to see if they sprout.
Reminder:
- Reordering Seeds: Remember to reorder seeds from Liqui-Dirt Organic Nursery and Garden at least four weeks before the next planting season to ensure you are fully prepared.
By following these steps, you can effectively harvest and securely store your Echinacea seeds, ensuring that you have high-quality seeds ready for planting or medicinal use in the upcoming season.
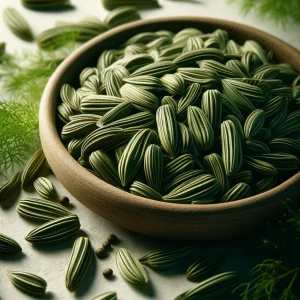
Fennel-Florence Herb Seeds ready for planting
Florence Fennel Herb Seeds, also known as finocchio or sweet fennel, is a highly aromatic and flavorful herb native to the Mediterranean region. It has been cultivated since ancient times, prized by the Greeks and Romans for its medicinal properties and culinary versatility. According to historical accounts, ancient warriors consumed fennel to make them strong and ready for battle, while Roman gladiators were said to eat the herb seeds to maintain their vigor.
Florence Fennel is distinctive from common fennel as it is characterized by its bulbous base, which is used as a vegetable. The bulb, stalks, leaves, and herb seeds of the plant are all edible, making it an exceptionally versatile ingredient in the kitchen. The flavor of Florence Fennel is sweet and mildly anise-like, with a crisp texture that adds depth to dishes.
The bulb itself is pale green, crisp, and slightly sweet, often used in salads, braised dishes, or roasted to bring out its natural sweetness. The stalks resemble celery and can be used in soups and stews. Florence Fennel’s feathery leaves are similar to dill and are excellent for garnishing or adding to salads for an extra burst of flavor. The herb seeds, which are more pungent, are often used in sausage making, baking, and in making herbal teas.
Florence Fennel is unique not only for its multipurpose use in the kitchen but also for its health benefits. It is rich in vitamin C, fiber, and potassium, and has properties that aid digestion, reduce inflammation, and can help soothe minor ailments like bloating and gas.
In the garden, Florence Fennel is relatively easy to grow but prefers cooler, early spring or late fall temperatures to prevent it from bolting (flowering prematurely). It requires well-drained, fertile soil and ample sunlight. Because of its deep root system, it needs plenty of water, especially during dry spells, to develop its flavorful bulbs.
Florence Fennel’s elegance and sweetness make it a favorite among chefs and home cooks alike, perfect for adding a touch of sophistication to any dish. Whether used raw in salads, cooked into savory meals, or as an aromatic addition to desserts, Florence Fennel is a delightful herb with a rich history and a bright future in culinary arts
Growing Florence Fennel:
- Planting: Florence Fennel is best planted in early spring or late summer to avoid the hottest parts of the year, which can cause it to bolt. It thrives in well-drained, fertile soil with a pH between 6.0 and 7.0. Full sun is ideal for its growth.
- Sowing Herb Seeds: Sow herb seeds directly into the garden about 1/4 inch deep and 12 to 18 inches apart. If starting herb seeds indoors, transplant them carefully to avoid disturbing the root system. Fennel does not transplant well due to its deep taproot.
Caring for Florence Fennel:
- Watering: Florence Fennel requires consistent moisture to develop plump and juicy bulbs. Water regularly, especially during dry periods, to keep the soil evenly moist but not soggy.
- Feeding: Apply a balanced, organic fertilizer at planting and mid-season after thinning. Florence Fennel is a heavy feeder and will benefit from regular nutrient inputs.
- Mulching: Mulch around the plants to help retain soil moisture, suppress weeds, and keep the root system cool.
- Thinning: Thin seedlings to avoid crowding and allow for the growth of large bulbs. Proper spacing is crucial for the development of the bulb.
Harvesting Florence Fennel:
- Timing: Florence Fennel is ready to harvest when the bulbs are about the size of a small tennis ball, typically 3 to 4 months after planting. You can also harvest the leaves and stems as needed throughout the growing season.
- Method: Harvest by cutting the bulb at the soil line. If you prefer, you can also pull up the entire plant to use the stalks and roots.
- Preserving Florence Fennel:
- Refrigerating: Florence Fennel bulbs can be stored in the refrigerator for up to two weeks. Wrap them in a damp paper towel and place them in a plastic bag to retain moisture.
- Freezing: Blanch sliced bulbs for 30 seconds, then cool them quickly in ice water, drain, and freeze in airtight containers or freezer bags.
- Drying: The fronds can be dried by hanging them in a well-ventilated, dark area or using a food dehydrator. Store dried fronds in an airtight container.
- Using Leaves and Herb Seeds: Fresh leaves can be used throughout the growing season for garnishing and flavoring dishes. Herb Seeds can be harvested once the flowers have dried and browned. Collect the dried herb seed heads, shake or strip the herb seeds, and store them in a cool, dry place.
Growing Florence Fennel provides a rewarding opportunity to enjoy a fresh, flavorful addition to your culinary repertoire. With proper care and favorable conditions, Florence Fennel can be a standout in your vegetable garden.
Seed Saving For The Future: Here’s an organized guide on how to harvest and store seeds from Florence Fennel (Foeniculum vulgare var. azoricum), designed to help you collect the best quality seeds for your next planting or culinary use:
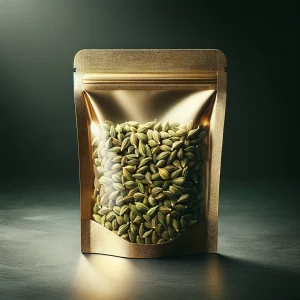
Fennel-Florence with Liqui-Dirt Seed Vault Storage Pouch
Tools Needed:
- Scissors or garden shears
- Liqui-Dirt Seed Preservation Pouch
- Paper Bag
- A fine mesh sieve
- Container or bowl
Steps to Harvest Florence Fennel Seeds:
1. Identifying Seed Heads:
- Timing: Keep an eye on your Florence Fennel plants as they mature. The optimal time to start seed harvesting is when the umbels (seed heads) turn from green to brown, which indicates the seeds are ripe. This typically occurs in late summer or early autumn.
- Visual Inspection: Look for the characteristic umbrella-shaped clusters of seed heads atop the plant stalks. These will contain the mature seeds.
2. Collecting Seed Heads:
- Cutting: Use scissors or garden shears to snip the stalks that bear mature, dry seed heads.
- Handling: Carefully place these stalks into a paper bag to catch any seeds that might fall as the seed heads dry further.
3. Drying the Seed Heads:
- Environment: Store the seed heads in a warm, dry area with good air circulation to ensure they dry thoroughly. Proper drying is crucial for easy seed extraction.
- Preparation for Seed Removal: The seed heads should be completely dry and should easily crumble when handled, ready for seed extraction.
4. Extracting the Seeds:
- Shaking: Shake the dried stalks vigorously inside the bag or over a bowl to dislodge the seeds from the umbels.
- Sieving: Use a fine mesh sieve to sift the seeds, separating them from any plant debris and chaff.
5. Storing the Seeds:
- Labeling: Utilize the Liqui-Dirt Seed Preservation Pouch for storing your seeds; this pouch is pre-labeled for your convenience.
- Storage Conditions: Store the seeds in the Seed Vault main pouch in a cool, dry place to maintain their viability and protect them from moisture.
Additional Tips:
- Plant Health: Harvest seeds from the healthiest Florence Fennel plants to ensure strong growth in the next season.
- Pest Control: Carefully inspect the seed heads for any signs of pest infestations or diseases before harvesting them.
- Seed Testing: To check seed viability, you can perform a germination test by planting a few seeds in moist soil to see if they sprout.
Reminder:
- Reordering Seeds: Make sure to order your next batch of seeds from Liqui-Dirt Organic Nursery and Garden at least four weeks before you plan to sow them, ensuring you’re well-prepared for the planting season.
By adhering to these steps, you can effectively harvest and securely store your Florence Fennel seeds, guaranteeing high-quality seeds ready for your culinary experiments or future garden planting.
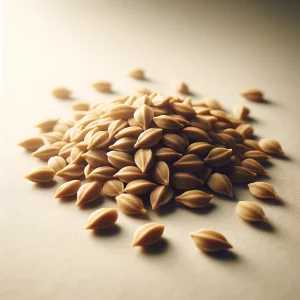
Fenugreek Herb Seeds ready for planting
Fenugreek Herb Seed, scientifically known as Trigonella foenum-graecum, is an herb with an ancient pedigree, revered since antiquity for its culinary and medicinal properties. Native to the Mediterranean region, South Europe, and Western Asia, fenugreek has been used in various cultures, including Egyptian, Greek, and Indian, for thousands of years. Historical records suggest that the Egyptians used it in embalming, while the Greeks and Romans employed it for cattle fodder and culinary purposes.
Fenugreek herb seeds are the most widely used part of the plant, known for their distinctive sweet, nutty flavor that also carries a hint of bitterness. When cooked, the herb seeds become milder and blend into dishes, imparting a complex sweetness reminiscent of maple syrup or burnt sugar. Fenugreek leaves, known as ‘methi’ in many parts of India, are also edible and characterized by their slightly bitter taste and a pungent aroma.
One of the unique characteristics of fenugreek is its dual use as both a spice and a herb. The seeds are often ground into a spice used in seasoning blends, such as Ethiopian berbere and Indian masalas. The leaves can be used both fresh and dried, adding flavor to salads, soups, and stews.
Fenugreek has a plethora of uses beyond the kitchen. It is highly valued in traditional medicine for its antidiabetic, anticarcinogenic, hypocholesterolemic, and antioxidant properties. It is commonly used to stimulate milk production in breastfeeding women, to balance blood sugar levels, and to treat digestive issues.
In addition, fenugreek herb seeds contain mucilage, a type of fiber that can soothe gastrointestinal inflammation by forming a protective coating along the digestive tract. The herb seeds are also used in the manufacture of cosmetics and soaps due to their beneficial effects on the skin.
In culinary applications, fenugreek herb seeds are often roasted to reduce their bitterness and bring out their sweetness. They are a key ingredient in spice mixes and curries, imparting a distinctive aroma and flavor. The leaves are popular in many Indian dishes, used to enhance the flavor of curries, dals, and vegetable dishes.
Fenugreek’s versatility in the kitchen and its numerous health benefits make it a cherished herb and spice in various culinary traditions and herbal medicine practices around the world.
Growing Fenugreek:
- Planting: Fenugreek thrives in warm, sunny climates but can grow in a range of environments. It prefers well-drained, loamy soil with a neutral to slightly acidic pH. You can start fenugreek indoors or sow seeds directly outdoors in early spring, as soon as the risk of frost has passed.
- Sowing Herb Seeds: Plant fenugreek herb seeds about 1/4 inch deep and 2 inches apart in rows spaced 6-8 inches apart. They germinate quickly, usually within a few days. For a continuous harvest, sow herb seeds in succession every few weeks.
Caring for Fenugreek:
- Watering: Water fenugreek regularly to keep the soil consistently moist but not waterlogged. The plant is somewhat drought tolerant but thrives with adequate moisture.
- Feeding: Fenugreek does not usually require fertilizer if grown in fertile soil. If your soil is poor, applying a balanced, organic fertilizer at planting and midway through the growing season can help promote healthy growth.
- Weeding: Keep the area around fenugreek plants free from weeds to prevent competition for nutrients and water.
- Pest and Disease Management: Fenugreek is relatively resistant to pests and diseases. However, keep an eye out for fungal diseases in damp conditions and use appropriate organic treatments if necessary.
Harvesting Fenugreek:
- Leaves: Fenugreek leaves can be harvested as soon as they are large enough to use—typically within 3-4 weeks of planting. Cut the leaves with scissors, taking care not to disturb the roots so that the plant can continue to produce new growth.
- Herb Seeds: Harvest herb seeds when the plant’s pods mature and turn yellow, about 8 weeks after planting. Collect the pods, dry them in the sun, and thresh them to extract the herb seeds.
Preserving Fenugreek:
- Drying Leaves: Fenugreek leaves can be dried by hanging them in small bunches in a well-ventilated, dry place out of direct sunlight. Once dried, crumble the leaves and store them in an airtight container.
- Storing Herb Seeds: Dry the herb seeds thoroughly after harvesting. Store them in an airtight container in a cool, dry place. They can be used whole or ground into powder as needed for cooking.
- Freezing Leaves: Fenugreek leaves can also be frozen for long-term storage. Blanch the leaves briefly, then shock them in ice water, drain well, and pack them in freezer bags.
Growing fenugreek (herb seeds) can be a rewarding endeavor, providing both nutritious leaves and flavorful seeds that can enhance a variety of dishes. Whether used fresh, dried, or frozen, fenugreek is a versatile and beneficial addition to your home garden.
Seed Saving For The Future: Here’s a thorough guide on how to harvest and store seeds from Fenugreek (Trigonella foenum-graecum), utilizing effective methods to ensure high-quality seeds for your next planting or culinary use:
Fenugreek with Liqui-Dirt Seed Vault Storage Pouch
Tools Needed:
- Scissors or garden shears
- Liqui-Dirt Seed Preservation Pouch
- Paper Bag
- A fine mesh sieve
- Container or bowl
Steps to Harvest Fenugreek Seeds:
1. Identifying Seed Pods:
- Timing: Monitor your Fenugreek plants as they mature. The best time to harvest seeds is when the pods turn from green to yellow and then a tan color, indicating that the seeds inside are ripe. This typically happens in late summer or early autumn.
- Visual Inspection: Look for the long, narrow pods that contain the seeds. These are ready for harvesting when they are dry and brittle.
2. Collecting Seed Pods:
- Cutting: Use scissors or garden shears to carefully cut the stalks that have mature, dry seed pods.
- Handling: Place these stalks into a paper bag to catch any seeds that might fall as the pods continue to dry and potentially open.
3. Drying the Seed Pods:
- Environment: Ensure that the seed pods are stored in a warm, dry place with good air circulation. Adequate drying is critical for easy seed extraction.
- Preparation for Seed Removal: The seed pods should be completely dry and should easily split open when handled, indicating that they are ready for seed extraction.
4. Extracting the Seeds:
- Shaking: Vigorously shake the dried stalks inside the bag or over a bowl to release the seeds from the pods.
- Sieving: Use a fine mesh sieve to sift the seeds, allowing them to fall into a bowl while keeping the pod husks and other debris out.
5. Storing the Seeds:
- Labeling: Use the Liqui-Dirt Seed Preservation Pouch for secure storage; this pouch is pre-labeled for your convenience.
- Storage Conditions: Store the seeds in the Seed Vault main pouch in a cool, dry place to maintain their viability and protect them from moisture.
Additional Tips:
- Plant Health: Harvest seeds from the healthiest Fenugreek plants to promote vigorous growth in future crops.
- Pest Control: Inspect the seed pods for any signs of pest infestations or diseases before harvesting them, and avoid using compromised materials.
- Seed Testing: To test the viability of the seeds, perform a germination test by planting a few seeds in moist soil to see if they germinate.
Reminder:
- Reordering Seeds: To prepare for the next growing season, remember to order new seeds from Liqui-Dirt Organic Nursery and Garden at least four weeks before you plan to sow.
By following these steps, you can efficiently harvest and securely store your Fenugreek seeds, ensuring that you have high-quality seeds ready for planting or for use in your culinary recipes.
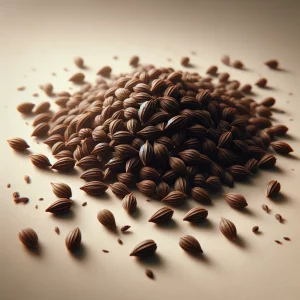
Hyssop Herb Seeds ready for planting
Hyssop Herb Seeds, (Hyssopus officinalis) is a herbaceous plant belonging to the mint family, and it has a long history of use dating back to ancient times. It is mentioned in the Bible for its cleansing and medicinal properties, and it was commonly used by monks in the Middle Ages to make herbal remedies, liqueurs, and perfumes. Native to the Mediterranean region, hyssop has been revered for both its therapeutic and culinary uses.
Hyssop is known for its strong, aromatic flavor, which has hints of mint and bitter undertones. Its taste is somewhat reminiscent of sage, mixed with savory minty elements, making it a unique and potent herb in the kitchen. The plant features narrow, spear-shaped leaves and produces beautiful blue, pink, or white flowers that attract bees, butterflies, and other pollinators.
One of the unique characteristics of hyssop is its essential oil, which is highly regarded for its antiseptic, cough-relieving, and anti-inflammatory properties. This makes hyssop a popular choice in traditional medicine, especially for treating respiratory conditions and digestive issues.
In the culinary world, hyssop leaves can be used fresh or dried to flavor soups, salads, stews, and sauces. They are particularly well-suited to dishes that benefit from a strong herbal presence, pairing well with fatty meats and game, and can be used in marinades or as part of a bouquet garni.
Hyssop also finds its use in the garden as an ornamental plant, thanks to its vibrant flowers and the pleasant aroma it emits. It’s often planted in borders or as a part of herb gardens, not only for its aesthetics but also for its ability to help in the garden ecosystem by attracting beneficial insects.
Aside from its medicinal and culinary uses, hyssop oil is used in aromatherapy and skin care for its soothing, rejuvenating properties. Whether used as a healing agent, a culinary herb, or a garden plant, hyssop offers a blend of beauty, utility, and history that can enrich one’s health and garden.
Growing and caring for hyssop (Hyssopus officinalis) is relatively straightforward, thanks to its hardy nature. Here’s how you can cultivate this aromatic herb in your garden:
Planting Hyssop Herb Seeds: Hyssop thrives in well-drained soil and full sun, although it can tolerate partial shade. It prefers a slightly alkaline soil pH, around 7.0 to 8.0. You can start hyssop from seeds, cuttings, or division.
- Sowing Herb Seeds: Plant hyssop herb seeds indoors about 8-10 weeks before the last frost date or directly sow herb seeds in the garden in spring or autumn. Barely cover the herb seeds with soil as they need light to germinate.
- Transplanting: When seedlings are large enough to handle and after the risk of frost has passed, transplant them outdoors, spacing them about 12 to 24 inches apart to allow for mature growth.
Caring for Hyssop:
- Watering: Water the plants regularly during the first growing season to establish a deep, extensive root system. Once established, hyssop is quite drought tolerant.
- Feeding: Hyssop generally does not require much fertilizer, especially if planted in decently fertile soil. If growth seems sluggish, a light feeding of a balanced organic fertilizer in early spring can help.
- Pruning: Prune hyssop in early spring to promote bushy growth and again after flowering to prevent it from becoming leggy and to encourage a second bloom.
- Pest and Disease Control: Hyssop is generally free from major pests and diseases. Keep an eye out for common garden pests such as aphids and treat with organic methods if necessary.
Harvesting Hyssop:
- When to Harvest: The best time to harvest hyssop leaves is just before the plants flower when the essential oils are at their peak. You can also harvest the leaves throughout the summer as needed.
- How to Harvest: Use garden shears or scissors to snip off branches or pick individual leaves. If you need flowers, cut the flower spikes as they bloom.
Preserving Hyssop:
- Drying: Tie cut stems together and hang them upside down in a dry, well-ventilated area away from direct sunlight. Once dry, strip the leaves and flowers from the stems and store them in an airtight container.
- Freezing: Hyssop leaves can also be frozen. Chop the fresh leaves and pack them into ice cube trays with water or olive oil, which can then be used directly in cooking.
- Making Infusions: Both fresh and dried hyssop can be used to make herbal teas or infused into oils and vinegars to capture its flavor and health benefits.
By following these steps, you can successfully grow, care for, and utilize hyssop in both culinary and medicinal applications, enjoying the rich history and robust flavors of this versatile herb.
Seed Saving For The Future: Here’s a comprehensive guide on how to harvest and store seeds from Hyssop (Hyssopus officinalis), using proven methods to ensure you collect the best quality seeds for your next planting:
Hyssop with Liqui-Dirt Seed Vault Storage Pouch
Tools Needed:
- Scissors or garden shears
- Liqui-Dirt Seed Preservation Pouch
- Paper Bag
- A fine mesh sieve
- Container or bowl
Steps to Harvest Hyssop Seeds:
1. Identifying Seed Heads:
- Timing: Keep an eye on your Hyssop plants as they mature. The ideal time for seed harvesting is when the flower spikes have faded and the seed heads have dried on the plant. This usually happens in late summer or early autumn.
- Visual Inspection: Look for the seed heads that form at the tops of the flower spikes. These heads contain the small, black seeds of the Hyssop plant.
2. Collecting Seed Heads:
- Cutting: Use scissors or garden shears to carefully cut the flower stalks that have mature, dry seed heads.
- Handling: Gently place these stalks into a paper bag to catch any seeds that might fall as the heads continue to dry and open.
3. Drying the Seed Heads:
- Environment: Ensure that the seed heads are kept in a warm, dry place with good air circulation to promote complete drying.
- Preparation for Seed Removal: The seed heads should be completely dry and brittle to the touch, making them ready for seed extraction.
4. Extracting the Seeds:
- Shaking: Vigorously shake the dried stalks inside the bag or over a bowl to release the seeds from the seed heads.
- Sieving: Use a fine mesh sieve to sift the seeds, allowing them to fall into a bowl while keeping the larger plant debris out.
5. Storing the Seeds:
- Labeling: Utilize the Liqui-Dirt Seed Preservation Pouch for storage; this pouch is pre-labeled for your convenience.
- Storage Conditions: Store the seeds in the Seed Vault main pouch in a cool, dry place to maintain their viability and protect them from moisture.
Additional Tips:
- Plant Health: Harvest seeds from the healthiest Hyssop plants to ensure strong and vigorous growth in the next season.
- Pest Control: Examine the seed heads for any signs of pests or diseases before collecting them. Avoid using any seeds from diseased or pest-infested plants.
- Seed Testing: To verify seed viability, perform a germination test by planting a few seeds in moist soil and observing whether they sprout.
Reminder:
- Reordering Seeds: Be sure to reorder seeds from Liqui-Dirt Organic Nursery and Garden at least four weeks before the next planting season to ensure you are well-prepared.
By meticulously following these steps, you can successfully harvest and securely store your Hyssop seeds, making sure you have high-quality seeds ready for planting or for use in herbal remedies and culinary recipes.
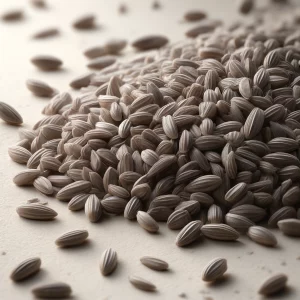
Lavender Herb Seeds ready for planting
Lavender Herb Seed, scientifically known as Lavandula, is a beloved herb native to the Mediterranean region, known for its vibrant flowers and soothing, aromatic fragrance. It has been used for thousands of years, dating back to ancient Egyptian times for mummification and as a perfume. The Romans used lavender to scent their baths, beds, clothes, and even hair. Throughout the Middle Ages and into the Renaissance, it was valued for both its medicinal and domestic uses.
The flavor of lavender is floral and slightly sweet, with pine and citrus notes, making it a distinctive herb in culinary applications. It’s often used in desserts like ice cream and cakes, as well as savory dishes such as stews and marinades. Lavender’s flavor is quite potent, so it is typically used sparingly to avoid overpowering dishes.
Lavender is most commonly known for its essential oil, which is extracted from the flowers of certain species, particularly Lavandula angustifolia, commonly known as English lavender. This essential oil is highly prized in the fragrance and beauty industries for its soothing properties and is also used therapeutically in aromatherapy to alleviate stress, anxiety, and insomnia.
The plant itself features narrow leaves and long, purple flower spikes that not only provide aesthetic appeal in gardens but are also highly attractive to bees and butterflies, contributing to pollination. Lavender plants can vary significantly in size, from small bushes to larger shrub forms, depending on the species.
Beyond its uses in cooking and essential oil production, lavender is also employed in floral arrangements and crafts, such as sachets and potpourris, which benefit from its long-lasting fragrance. In the garden, lavender is valued not only for its beauty and scent but also for its ability to withstand drought, making it an excellent choice for water-efficient landscaping.
In sum, lavender’s rich history, delightful flavor, and multitude of uses make it a cherished herb in gardens, kitchens, and homes around the world. Its enduring popularity attests to its myriad benefits, from aesthetic to therapeutic, enhancing both physical spaces and the well-being of those who cultivate and enjoy it.
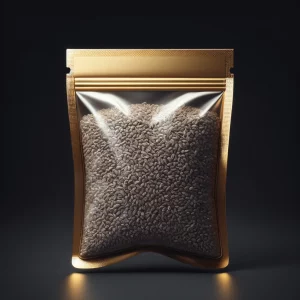
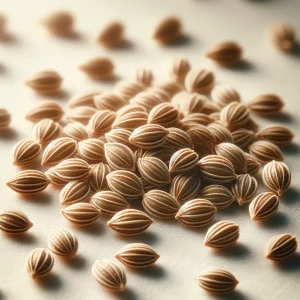
Lemon-Balm Herb Seeds ready for planting
Lemon Balm Herb Seeds, scientifically known as Melissa officinalis, is a perennial herb from the mint family, native to Europe, North Africa, and West Asia. Its history of use dates back over 2,000 years; ancient Greeks and Romans used it for its medicinal properties, particularly to promote longevity and alleviate symptoms of melancholy. Historical texts suggest it was a favorite in the medieval herb garden, and it was used in the still rooms of the 16th century, where it was a key ingredient in herbal waters and wines.
Lemon balm is cherished for its fresh, lemony scent and mild, herbaceous flavor, which is reminiscent of mint with subtle citrus notes. The leaves are soft, wrinkly, and heart-shaped with slightly toothed edges, typically light green in color.
One of the unique characteristics of lemon balm is its high concentration of volatile oils, including citronellal and citral, which are largely responsible for its strong, uplifting lemon scent. This makes it an excellent choice for use in aromatherapy to reduce stress and anxiety. It’s also thought to have antiviral properties, particularly against herpes simplex virus, and is used in traditional medicine to treat cold sores.
In the culinary world, lemon balm is used to add a lemony flavor to a variety of dishes. It enhances salads, soups, and sauces, and pairs well with poultry and fish. It’s also a delightful addition to desserts and beverages, such as teas, smoothies, and cocktails, where its subtle lemon flavor can be a refreshing complement.
Aside from its culinary and medicinal uses, lemon balm is beneficial in the garden as a companion plant. It attracts bees and other pollinators while its strong scent can help repel certain pests. The plant is also easy to grow, spreading readily, which makes it a vigorous addition to any herb garden, although its growth needs to be controlled to prevent it from overtaking other plants.
Overall, lemon balm’s soothing aroma, pleasant taste, and health-promoting qualities make it a versatile herb in both the garden and the kitchen. Whether used to brew a calming tea, flavor dishes, or as a natural remedy, lemon balm is a valuable herb with a rich historical lineage.
Growing and caring for lemon balm herb seeds (Melissa officinalis) is rewarding due to its versatile uses and easy maintenance. Here’s how you can cultivate this delightful herb seeds in your garden:
Planting Lemon Balm Herb Seeds:
- Choosing a Location: Lemon balm herb seeds thrives in full sun to partial shade. These herb seeds prefers a well-drained, fertile soil but can tolerate a range of soil conditions.
- Planting Time: You can start lemon balm herb seeds indoors about 6-8 weeks before the last frost date, or sow herb seeds directly into the garden in spring. Lemon balm herb seeds can also be propagated from cuttings or by division in spring or fall.
- Spacing: Space plants or seedlings about 18-24 inches apart to give them room to spread.
Caring for Lemon Balm:
- Watering: Keep the soil consistently moist, especially during hot, dry periods. Lemon balm likes hydration but it’s important to avoid waterlogging.
- Weeding: Regularly remove weeds around the plants to prevent competition for nutrients and water.
- Feeding: Apply a light layer of compost or a balanced organic fertilizer in the spring to promote lush growth.
- Pruning: Cut back the plants in midsummer to encourage new growth and prevent it from becoming woody. Lemon balm can become invasive, so trimming will also help control its spread.
Harvesting Lemon Balm:
- Best Time to Harvest: The best time to harvest lemon balm is in the morning after the dew has dried but before the sun is at its peak, as this is when the essential oils are most concentrated.
- Method: Harvest lemon balm by snipping the stems just above a pair of leaves. This encourages the plant to branch out and grow more foliage. Regular harvesting is beneficial for the plant and can extend its productivity through the season.
Preserving Lemon Balm:
- Drying: To dry lemon balm, tie small bunches of stems together and hang them upside down in a warm, dry, and well-ventilated place away from direct sunlight. Once dried, strip the leaves from the stems and store them in an airtight container.
- Freezing: Lemon balm freezes well. Chop the fresh leaves and pack them into ice cube trays, cover with water, and freeze. Alternatively, you can freeze the chopped leaves in a flat layer on a baking sheet and then transfer them to a freezer bag.
- Making Tea: Fresh or dried lemon balm leaves can be used to make a refreshing herbal tea. Store dried leaves in airtight containers to preserve their aromatic oils.
Lemon balm herb seeds are not only easy to grow but also a delightful addition to the garden with its lemon-scented leaves that can be used in cooking, herbal teas, and for medicinal purposes. Its carefree growth habit and ability to attract pollinators make it a valuable plant for both novice and experienced
Seed Saving For The Future: Here’s a structured guide on how to harvest and store seeds from Lemon Balm (Melissa officinalis), using established methods to ensure you collect the best quality seeds for your gardening projects:
Lemon-Balm with Liqui-Dirt Seed Vault Storage Pouch
Tools Needed:
- Scissors or garden shears
- Liqui-Dirt Seed Preservation Pouch
- Paper Bag
- A fine mesh sieve
- Container or bowl
Steps to Harvest Lemon Balm Seeds:
1. Identifying Seed Heads:
- Timing: Monitor your Lemon Balm plants as they mature. The ideal time to harvest seeds is when the flower clusters have dried on the plant and the seeds have turned brown. This usually occurs in late summer or early autumn.
- Visual Inspection: Look for the dried, brown clusters of tiny seed heads that form where the flowers were located on the plant stems.
2. Collecting Seed Heads:
- Cutting: Use scissors or garden shears to carefully snip off the stems that have mature, dry seed heads.
- Handling: Gently place these stems into a paper bag to catch any seeds that might fall as the heads continue to dry and open.
3. Drying the Seed Heads:
- Environment: Ensure the seed heads are stored in a warm, dry place with good air circulation to promote complete drying.
- Preparation for Seed Removal: The seed heads should be completely dry and brittle to the touch, making them easy to crumble when handled.
4. Extracting the Seeds:
- Shaking: Vigorously shake the dried stems inside the bag or over a bowl to loosen and release the seeds from the seed heads.
- Sieving: Use a fine mesh sieve to sift the seeds, allowing them to fall into a bowl while keeping the larger plant debris out.
5. Storing the Seeds:
- Labeling: Use the Liqui-Dirt Seed Preservation Pouch for storage; this pouch is pre-labeled for your convenience.
- Storage Conditions: Store the seeds in the Seed Vault main pouch in a cool, dry place to maintain their viability and protect them from moisture.
Additional Tips:
- Plant Health: Harvest seeds from the healthiest Lemon Balm plants to ensure the best quality for future planting.
- Pest Control: Carefully inspect the seed heads for any signs of pests or diseases before collecting them. Use only healthy seeds for storage.
- Seed Testing: Perform a germination test by planting a few seeds in moist soil to check their viability.
Reminder:
- Reordering Seeds: To prepare for the next growing season, make sure to order new seeds from Liqui-Dirt Organic Nursery and Garden at least four weeks before you plan to sow.
By following these detailed steps, you can effectively harvest and securely store your Lemon Balm seeds, ensuring that you have high-quality seeds ready for the next planting season or for use in herbal remedies and culinary applications.
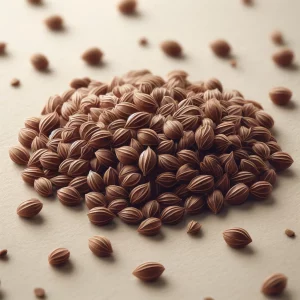
Marjoram Herb Seeds ready for planting
Marjoram Herb Seeds, scientifically known as Origanum majorana, is a delicate herb belonging to the mint family, closely related to oregano but with a milder, sweeter flavor. Native to Cyprus and southern Turkey, marjoram has been cherished throughout history for both its culinary and medicinal properties. Ancient Greeks and Romans held marjoram in high regard, associating it with love and happiness. It was often woven into wedding crowns and used in various rituals to symbolize joy and honor.
Marjoram’s flavor is warm, slightly spicy, with hints of citrus and pine, making it a more nuanced alternative to oregano. Its leaves are small, oval, and slightly hairy, and it produces tiny, white or pink flowers that are also edible. This herb is typically used in its dried form, which concentrates its delicate flavors more than fresh leaves.
One of the unique characteristics of marjoram is its versatility in culinary applications. It is a popular ingredient in French, North African, Middle Eastern, and Mediterranean cuisines. Marjoram complements a wide range of foods, from vegetables and meats to soups and sauces. It pairs particularly well with poultry and game, as well as in seasoning blends for sausages and stuffings.
In addition to its culinary uses, marjoram is appreciated for its aromatic qualities and potential health benefits. It has been used in traditional medicine to aid digestion, relieve nausea, and alleviate common ailments like colds and insomnia. The essential oil derived from marjoram is also used in aromatherapy to promote relaxation and reduce stress.
Marjoram is relatively easy to grow, preferring full sun and well-drained soil. It thrives in warm climates but can also be grown as an annual in cooler regions. In the garden, marjoram attracts beneficial insects, including bees and butterflies, contributing to the ecological health of the area.
Whether used to flavor a hearty stew, season a roast, or enrich a herbal tea, marjoram adds a subtle sophistication to dishes and herbal preparations. Its rich history and pleasant flavor profile make it a valuable addition to any culinary or medicinal herb collection.
Growing marjoram (Origanum majorana) offers a delightful addition to your herb garden with its sweet flavor and pleasant aroma. Here’s how to cultivate and care for this versatile herb:
Planting Marjoram Herb Seeds:
- Choosing a Site: Marjoram herb seeds prefers full sun but can tolerate partial shade. It thrives best in well-drained soil with a neutral to slightly alkaline pH.
- Starting Herb Seeds: You can start marjoram herb seeds indoors about six weeks before the last frost date. Sow the herb seeds shallowly, as they need light to germinate. Keep the soil moist until germination, which typically occurs within 1-2 weeks.
- Transplanting: Once the seedlings are strong enough and all risk of frost has passed, transplant them outdoors, spacing them about 8-10 inches apart.
Caring for Marjoram:
- Watering: Water marjoram regularly, allowing the soil to dry out slightly between waterings. Overwatering or poor drainage can lead to root rot, so ensure good soil aeration.
- Feeding: Marjoram does not require much fertilization. If growth seems sluggish, you can apply a balanced organic fertilizer mid-season, but avoid overfeeding.
- Pruning: To encourage bushier growth and prevent legginess, pinch back the growing tips of the plant, especially before it blooms. Regular pruning also helps maintain the plant’s compact shape and enhances leaf production.
Harvesting Marjoram:
- Best Time to Harvest: The best time to harvest marjoram is just before the flowers bloom when the leaves contain the highest concentration of essential oils, offering the best flavor and aroma.
- Method: Harvest marjoram by snipping the stems with scissors or pruning shears. You can cut back up to one-third of the plant at a time to allow for regrowth.
Preserving Marjoram:
- Drying: Marjoram dries well and retains much of its flavor. Tie the cut stems in small bunches and hang them upside down in a warm, dry, well-ventilated area away from direct sunlight. Once dried, strip the leaves from the stems and store them in an airtight container.
- Freezing: Freezing is another effective way to preserve marjoram. Chop the fresh leaves and place them in an ice cube tray, covering with water or olive oil, then freeze. Alternatively, you can freeze the whole leaves on a baking sheet and then transfer them to a freezer bag.
- Storing: Keep dried marjoram in a cool, dark place in an airtight container to maintain its potency for up to a year.
Growing marjoram herb seeds not only enhances your culinary palette but also adds beauty and fragrance to your garden. With minimal care, marjoram provides a bountiful harvest that can be enjoyed fresh or preserved to flavor dishes year-round.
Seed Saving For The Future: Here’s a complete guide on how to harvest and store seeds from Marjoram (Origanum majorana), utilizing effective techniques to ensure you collect high-quality seeds for your next planting:
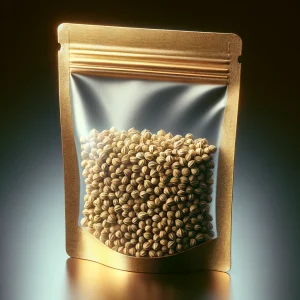
Marjoram with Liqui-Dirt Seed Vault Storage Pouch
Tools Needed:
- Scissors or garden shears
- Liqui-Dirt Seed Preservation Pouch
- Paper Bag
- A fine mesh sieve
- Container or bowl
Steps to Harvest Marjoram Seeds:
1. Identifying Seed Heads:
- Timing: Keep an eye on your Marjoram plants as they flower and mature. The best time for seed harvesting is when the flower heads have dried and the seeds within have turned brown. This typically occurs in late summer or early autumn.
- Visual Inspection: Look for the small, dry flower heads; they will contain tiny, brown seeds.
2. Collecting Seed Heads:
- Cutting: Use scissors or garden shears to carefully trim the stems that bear the mature, dry seed heads.
- Handling: Place these trimmed stems into a paper bag to capture any seeds that may fall as the seed heads continue to dry and open further.
3. Drying the Seed Heads:
- Environment: Store the seed heads in a warm, dry place with ample air circulation to ensure thorough drying.
- Preparation for Seed Removal: The seed heads should be completely dry and brittle, which indicates that they are ready for seed extraction.
4. Extracting the Seeds:
- Shaking: Vigorously shake the dried stems inside the bag or over a bowl to dislodge the seeds from the flower heads.
- Sieving: Use a fine mesh sieve to sift the seeds, allowing the tiny seeds to fall into a bowl while keeping the floral debris out.
5. Storing the Seeds:
- Labeling: Utilize the Liqui-Dirt Seed Preservation Pouch for storage. This pouch is pre-labeled for convenience.
- Storage Conditions: Keep the seeds in the Seed Vault main pouch in a cool, dry place to preserve their viability and protect them from moisture.
Additional Tips:
- Plant Health: Only harvest seeds from the healthiest Marjoram plants to ensure superior growth in future plantings.
- Pest Control: Inspect the seed heads for any signs of pests or disease before and after drying; avoid using seeds from affected plants.
- Seed Testing: To verify seed viability, perform a germination test by planting a few seeds in moist soil to see if they sprout.
Reminder:
- Reordering Seeds: Ensure you are prepared for the next growing season by ordering new seeds from Liqui-Dirt Organic Nursery and Garden at least four weeks before you plan to plant.
By following these steps, you can efficiently harvest and securely store your Marjoram seeds, guaranteeing that you have high-quality seeds ready for the next planting season or for use in culinary dishes.
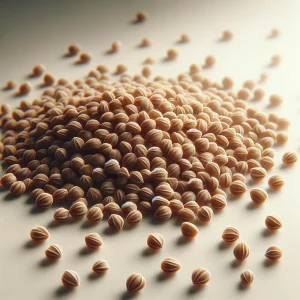
Mint Herb Seeds ready for planting
Mint herb seeds, belonging to the genus Mentha, is a widely recognized and cherished herb known for its vibrant aroma and refreshing taste. Its history dates back thousands of years: ancient Greeks and Romans used mint for everything from scenting their bodies and homes to flavoring their food and wine. In mythology, mint is named after Minthe, a nymph transformed into a plant by Persephone, who was jealous of her beauty. Throughout the ages, mint has been used medicinally, notably by the Egyptians, as evidenced by mint leaves found in the pyramids.
The flavor of mint is distinctly fresh and cool due to its high menthol content, which also gives it a slightly sweet undertone. This makes it incredibly versatile in both culinary and beverage applications. It pairs well with a multitude of flavors, from chocolate and fruit to lamb and vegetables.
Mint’s unique characteristics include its vigorous growth habit and its tendency to spread quickly if not contained. This perennial herb produces square, branching stems adorned with oblong or lance-shaped leaves, and depending on the variety, flowers in shades of white to pink or purple.
There are several popular varieties of mint, each with subtle flavor differences:
- Peppermint Herb Seeds (Mentha piperita): Known for its strong, sharp flavor and high menthol content, it’s popular in candies and medicinal uses.
- Spearmint Herb Seeds (Mentha spicata): Milder than peppermint, it’s often used in cooking and cocktails.
- Apple mint Herb Seeds (Mentha suaveolens): Slightly sweeter and milder, with a hint of apple, suitable for fruit salads and beverages.
- Chocolate mint Herb Seeds (Mentha x piperita ‘Chocolate’): Offers nuances of chocolate, making it a favorite for desserts.
In the kitchen, mint is indispensable. It can be used fresh in salads, mint sauce, and to garnish desserts; dried for teas and spice blends; or infused into syrups and oils. Its culinary uses are matched by its popularity in beverages, from the classic mojito and mint julep to a simple mint tea.
Beyond its culinary uses, mint is prized in aromatherapy for its ability to invigorate and soothe, making it a common ingredient in lotions, balms, and perfumes. Additionally, it’s used in home remedies to aid digestion and relieve symptoms of colds and flu.
Mint’s easy cultivation and wide range of applications make it a favorite among gardeners and chefs alike, offering a pleasing addition to gardens, dishes, and natural remedies.
Mint herb seeds are a versatile and hardy herb that thrives with minimal fuss, making it a favorite among gardeners of all skill levels. Here’s a comprehensive guide on how to grow, care for, harvest, and preserve mint:
Growing Mint Herb Seeds:
- Choosing a Location and Soil: Mint Herb Seeds prefers full sun to partial shade and grows best in rich, moist, well-drained soil. It’s adaptable and can grow in less ideal conditions but might not be as vigorous.
- Planting: You can start mint herb seeds, but it’s easier and faster to grow from cuttings, root divisions, or transplants purchased from a nursery. Mint spreads quickly via its root system, so many gardeners prefer to plant it in containers to prevent it from taking over garden spaces. However grown from the Herb Seeds the mint will adapt to the area planted faster then cuttings.
- Spacing: If planting in the ground, space mint plants about 18-24 inches apart. This gives each plant room to grow without overcrowding.
Caring for Mint Herb Seeds:
- Watering: Keep the soil consistently moist. Mint doesn’t like dry conditions, but it’s also important to avoid waterlogged soil which can lead to root rot.
- Feeding: Mint is not a heavy feeder, but applying a balanced, all-purpose fertilizer in the early spring can encourage lush growth.
- Pruning: Regular pruning is beneficial. Pinch off the tips of the stems regularly to encourage bushier growth and to prevent the plant from flowering, as flowering can reduce the potency of the leaves.
Harvesting Mint:
- When to Harvest: The best time to harvest mint is in the morning when its essential oils are strongest. You can begin harvesting as soon as the plant has multiple shoots and is about 6 inches tall.
- How to Harvest: Cut the stems with scissors or garden shears, leaving about one-third of the length so the plant can regenerate. Frequent harvesting encourages the plant to produce new growth.
- Preserving Mint:
- Drying: To dry mint, tie the stems into small bunches and hang them upside down in a warm, dry place with good air circulation. Once the leaves are dry, strip them from the stems and store in an airtight container.
- Freezing: Mint freezes well. Wash and dry the leaves, then chop them if desired and pack into ice cube trays with water, or lay them flat on a baking sheet to freeze before transferring to a freezer bag.
- Mint Oil or Vinegar: Infuse fresh mint into oil or vinegar for culinary uses. Place fresh leaves in a clean jar, cover with oil or vinegar, and let it sit for a few weeks in a cool, dark place before straining.
Growing mint herb seeds is a rewarding experience due to its many uses in food, drinks, and home remedies. Whether you grow it in your garden or in containers, mint is a prolific plant that can provide fresh herbs throughout the growing season.
Seed Saving For The Future: Here’s an in-depth guide on how to harvest and store seeds from Mint (Mentha spp.), using proven techniques to ensure you collect the best quality seeds for your gardening or culinary uses:
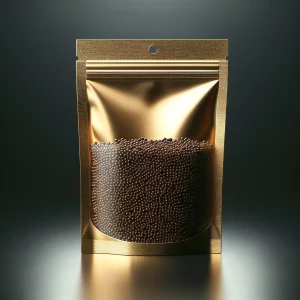
Mint with Liqui-Dirt Seed Vault Storage Pouch
Tools Needed:
- Scissors or garden shears
- Liqui-Dirt Seed Preservation Pouch
- Paper Bag
- A fine mesh sieve
- Container or bowl
Steps to Harvest Mint Seeds:
1. Identifying Seed Heads:
- Timing: Monitor your Mint plants as they flower and mature. The best time for seed harvesting is when the flower heads have dried on the plant and the seeds have turned brown. This usually occurs in late summer or early autumn.
- Visual Inspection: Look for the dried flower heads; they will contain tiny, brownish-black seeds.
2. Collecting Seed Heads:
- Cutting: Use scissors or garden shears to snip off the stems that bear the mature, dry seed heads.
- Handling: Place these stems into a paper bag to catch any seeds that might fall as the heads continue to dry and open.
3. Drying the Seed Heads:
- Environment: Ensure the seed heads are kept in a warm, dry place with good air circulation. Adequate drying is essential for easy seed extraction.
- Preparation for Seed Removal: The seed heads should be completely dry and brittle, making them ready for seed extraction.
4. Extracting the Seeds:
- Shaking: Vigorously shake the dried stems inside the bag or over a bowl to release the seeds from the flower heads.
- Sieving: Use a fine mesh sieve to sift the seeds, allowing them to fall into a bowl while keeping the floral debris out.
5. Storing the Seeds:
- Labeling: Use the Liqui-Dirt Seed Preservation Pouch for storage; this pouch is pre-labeled for your convenience.
- Storage Conditions: Store the seeds in the Seed Vault main pouch in a cool, dry place to maintain their viability and protect them from moisture.
Additional Tips:
- Plant Health: Harvest seeds from the healthiest Mint plants to ensure robust growth in the next season.
- Pest Control: Carefully inspect the seed heads for any signs of pests or diseases before collecting them; avoid using seeds from affected plants.
- Seed Testing: To check seed viability, perform a germination test by planting a few seeds in moist soil to see if they sprout.
Reminder:
- Reordering Seeds: To prepare for the next planting season, remember to order new seeds from Liqui-Dirt Organic Nursery and Garden at least four weeks before you plan to sow.
By meticulously following these steps, you can effectively harvest and securely store your Mint seeds, ensuring that you have high-quality seeds ready for planting or for adding a fresh burst of flavor to your dishes.
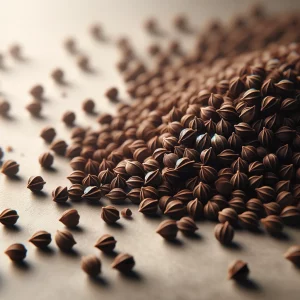
Oregano-Slow-Bolt Herb Seeds ready for planting
Oregano Herb Seeds, scientifically known as Origanum vulgare, is a robust herb native to the Mediterranean and Western Asia. Its name derives from the Greek words “oros” (mountain) and “ganos” (joy), essentially meaning “joy of the mountains.” Oregano has been valued for centuries, not just in culinary applications but also for its medicinal properties. Ancient Greeks and Romans associated oregano with happiness and used it extensively to treat various ailments such as skin irritations and respiratory issues.
Oregano is a staple in Mediterranean cooking, known for its strong, zesty flavor, which is slightly bitter and peppery with a hint of mint. This makes it a favorite in Italian, Greek, and Mexican cuisines. The plant itself is distinguished by its small, rounded, dark green leaves and tiny purple flowers, which are also edible.
One of the unique characteristics of oregano is its potent aroma and high concentration of antioxidants, making it not only flavorful but also beneficial for health. It contains thymol and carvacrol, two oils which have notable antibacterial and anti-inflammatory properties.
In culinary uses, oregano shines in a variety of dishes. It’s essential in Italian seasonings for pizza and pasta sauces, as well as in Greek marinades for meats and vegetables. Oregano complements other robust flavors like garlic and basil, and it is also a key ingredient in herbes de Provence and za’atar. Beyond its fresh form, dried oregano is widely used and preferred in many recipes for its more concentrated flavor.
Oregano’s herb seeds have an ease of cultivation that adds to its popularity. It’s herb seeds thrive in well-drained soil under full sun, resembling its native habitat in the Mediterranean. The herb seeds are drought-resistant once established, making it a suitable choice for rock gardens and other low-water garden designs.
Oregano’s robust flavor and health benefits make it a must-have in any culinary herb garden. Its uses extend beyond cooking, including applications in traditional remedies and homemade cleaning products, showcasing its versatility and enduring appeal.
Growing and caring for oregano herb seeds is rewarding, as this hardy herb seeds thrives with minimal attention and can provide a plentiful harvest. Here’s how to cultivate oregano herb seeds successfully in your garden or containers:
Planting Oregano Herb Seeds:
- Choosing a Site: Oregano Herb Seeds prefers full sun and well-drained soil. It is tolerant herb seeds in poor soil conditions but thrives in nutrient-rich, slightly sandy soil.
- Starting from Herb Seeds or Cuttings: You can start oregano from herb seeds, but it is easier and faster to grow from cuttings or by dividing an existing plant. If starting from herb seeds, sow the herb seeds indoors 6-10 weeks before the last frost, or directly outdoors in spring.
- Transplanting: Transplant seedlings or small plants outdoors once the danger of frost has passed, spacing them about 8-10 inches apart. Oregano can also be grown in pots, making it a good choice for balconies or patios.
Caring for Oregano:
- Watering: Water oregano plants regularly until they are established. Once mature, oregano is drought-tolerant and requires watering only during prolonged dry spells.
- Feeding: Oregano does not require much fertilizer. If growth seems slow, you can apply a light feeding of balanced organic fertilizer in the early spring.
- Pruning: To encourage bushier and more compact growth, prune or pinch back the growing tips periodically, especially before the plant blooms. This also helps to delay flowering and extend the harvesting period.
Harvesting Oregano:
- Best Time to Harvest: The best flavor of oregano leaves comes just before the plant flowers when the oil content and flavor are at their peak. This typically occurs in early to mid-summer.
- Method: Harvest oregano by snipping off stems or just the leaves as needed. For larger harvests, you can cut back whole stems, leaving at least two-thirds of the plant intact to recover.
Preserving Oregano:
- Drying: Oregano dries well and retains much of its flavor. Tie stems together and hang them upside down in a warm, dry, well-ventilated area out of direct sunlight. Once dried, strip the leaves from the stems and store them in an airtight container.
- Freezing: Freeze oregano by washing and drying the leaves, then placing them whole or chopped in freezer bags. Alternatively, freeze chopped oregano in ice cube trays filled with water or olive oil.
- Storing: Dried oregano should be stored in an airtight container in a cool, dark place to maintain its potency for up to a year.
Growing oregano herb seeds is straightforward, and it provides a versatile herb that enhances numerous dishes with its robust flavor. Whether fresh, dried, or frozen, oregano is a staple herb that can elevate the flavor profiles of your culinary creations.
Seed Saving For The Future: Here’s a comprehensive guide on how to harvest and store seeds from Oregano (Origanum vulgare), utilizing best practices to ensure you collect the highest quality seeds for your next gardening project:
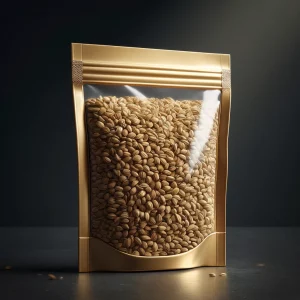
Oregano with Liqui-Dirt Seed Vault Storage Pouch
Tools Needed:
- Scissors or garden shears
- Liqui-Dirt Seed Preservation Pouch
- Paper Bag
- A fine mesh sieve
- Container or bowl
Steps to Harvest Oregano Seeds:
1. Identifying Seed Heads:
- Timing: Monitor your Oregano plants as they flower and mature. The ideal time for seed harvesting is when the flower heads have dried on the plant and the tiny seeds are visible within the dried blooms. This typically occurs in late summer or early autumn.
- Visual Inspection: Look for the small, dry flower heads; they will contain minuscule, brown seeds.
2. Collecting Seed Heads:
- Cutting: Use scissors or garden shears to carefully cut the stems that have mature, dry seed heads.
- Handling: Place these stems into a paper bag to catch any seeds that might fall as the heads continue to dry and potentially open.
3. Drying the Seed Heads:
- Environment: Ensure that the seed heads are stored in a warm, dry place with good air circulation to promote thorough drying.
- Preparation for Seed Removal: The seed heads should be completely dry and brittle, making them easy to crumble when handled.
4. Extracting the Seeds:
- Shaking: Vigorously shake the dried stems inside the bag or over a bowl to loosen and release the seeds from the flower heads.
- Sieving: Use a fine mesh sieve to sift the seeds, filtering them from the floral debris and chaff.
5. Storing the Seeds:
- Labeling: Use the Liqui-Dirt Seed Preservation Pouch for storing your seeds; this pouch is pre-labeled for convenience.
- Storage Conditions: Store the seeds in the Seed Vault main pouch in a cool, dry place to ensure their viability and protect them from moisture.
Additional Tips:
- Plant Health: Select seeds from the healthiest Oregano plants to enhance growth quality in the next planting season.
- Pest Control: Inspect the seed heads for any signs of pest or disease before and after drying; discard any that are compromised.
- Seed Testing: To assess seed viability, perform a germination test by planting a few seeds in moist soil to see if they sprout.
Reminder:
- Reordering Seeds: Be sure to reorder your Oregano seeds from Liqui-Dirt Organic Nursery and Garden at least four weeks before the next planting season to ensure you are fully prepared.
By adhering to these steps, you can effectively harvest and securely store your Oregano seeds, guaranteeing that you have high-quality seeds ready for planting or for culinary use in your kitchen.
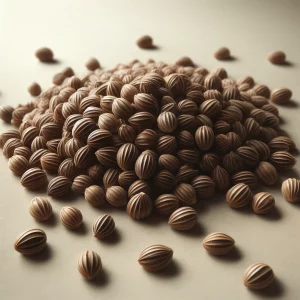
Parsley Herb Seeds ready for planting
Parsley Herb Seeds, scientifically known as Petroselinum crispum, is a staple herb in cuisines around the globe, known for its vibrant flavor and decorative appeal. Native to the central Mediterranean region (southern Italy, Algeria, and Tunisia), parsley has been cultivated and valued for more than 2,000 years. Historical records trace its use back to the ancient Greeks, who associated it with Archemorus, the herald of death, and thus often used it in funeral rites. However, by the Middle Ages, parsley had transitioned to a more culinary and medicinal role, especially popular in Europe.
Parsley features two main varieties: flat-leaf (Italian) parsley and curly leaf parsley. Flat-leaf parsley has a more robust flavor and is preferred for cooking, while curly leaf parsley is often used as a garnish due to its decorative, ruffled appearance. Both types have a clean and peppery taste with a hint of earthiness, making them versatile in a range of dishes.
Parsley is particularly rich in vitamins A, C, and K, and contains antioxidants and flavonoids that are thought to provide health benefits, such as anti-inflammatory properties and improved heart health. It’s not only the leaves that are useful; the stems also have intense flavor and can be used in stocks or soups.
In the kitchen, parsley is nearly ubiquitous. It can be used fresh in salads, as a garnish on soups and stews, or as a key ingredient in dishes like tabbouleh. It’s also essential in flavoring blends such as the French bouquet garni and fines herbes, and the Italian gremolata. Beyond its fresh uses, parsley can be blended into sauces like chimichurri or mixed into butters for a flavorful topping for bread and steaks.
Parsley’s hardiness as a biennial plant in temperate climates makes it a garden favorite. It can thrive in full sun to partial shade and prefers rich, moist soil. The plant is also known for its ability to attract beneficial insects, including butterflies, adding ecological value to gardens beyond its culinary uses.
Overall, parsley is esteemed not only for its culinary versatility but also for its decorative and nutritional qualities, making it a cherished herb in kitchens and gardens worldwide.
Growing parsley Herb Seeds (Petroselinum crispum) is a rewarding experience for any gardener due to its versatility in the kitchen and the garden. Here’s a comprehensive guide on how to cultivate these popular herb seeds:
Planting Parsley Herb Seeds:
- Choosing a Location: Parsley Herb Seeds thrive in full sun to partial shade. It’s herb seeds prefers rich, loamy, well-drained soil with a pH between 6.0 and 7.0.
- Starting from Herb Seeds: Parsley Herb seeds can be slow to germinate, often taking 2-4 weeks. Soak the herb seeds overnight to help speed up germination. You can start herb seeds indoors 6-8 weeks before the last frost or sow the herb seeds directly in the garden in early spring.
- Transplanting: If started indoors, transplant seedlings to the garden when they are about 2-3 inches tall and all danger of frost has passed. Space them about 8-12 inches apart.
Caring for Parsley:
- Watering: Keep the soil consistently moist but not waterlogged. Parsley has a deep root system that benefits from deep, infrequent watering once established.
- Feeding: Apply a balanced liquid fertilizer every 4-6 weeks, especially if you are harvesting leaves regularly.
- Mulching: Mulch around the plants to help retain soil moisture, suppress weeds, and keep the roots cool.
Harvesting Parsley:
- When to Harvest: Parsley can be harvested as soon as the leaves form three segments, which usually happens within 70-90 days after planting. For the best flavor, harvest in the morning.
- How to Harvest: Cut the outer leaves at the base of the plant to encourage continuous growth. Be careful not to cut more than one-third of the plant at a time.
Preserving Parsley:
- Drying: Tie the parsley stems into small bunches and hang them upside down in a warm, well-ventilated area away from direct sunlight. Once dry, crumble the leaves and store them in an airtight container.
- Freezing: Parsley freezes well. Chop the fresh leaves and pack them into ice cube trays with water, broth, or olive oil, then freeze. You can also blanch the leaves for a few seconds, plunge them into ice water, drain, and then freeze in a single layer on a baking sheet before transferring to freezer bags.
- Refrigerating: Fresh parsley can be stored in the refrigerator for up to two weeks. Place the stems in a jar of water, like a bouquet, and cover the leaves with a plastic bag.
Parsley herb seeds is not only a culinary staple but also a lovely addition to any garden. Its bright green foliage can liven up any space, and it pairs well with other herbs and vegetables. By following these tips, you can enjoy a steady supply of fresh parsley throughout the growing season and beyond.
Seed Saving For The Future: Here’s a detailed guide on how to harvest and store seeds from Parsley (Petroselinum crispum), using effective methods to ensure you collect high-quality seeds for your next planting:
Parsley with Liqui-Dirt Seed Vault Storage Pouch
Tools Needed:
- Scissors or garden shears
- Liqui-Dirt Seed Preservation Pouch
- Paper Bag
- A fine mesh sieve
- Container or bowl
Steps to Harvest Parsley Seeds:
1. Identifying Seed Heads:
- Timing: Monitor your Parsley plants as they mature. The optimal time for seed harvesting is when the seed heads (umbels) have dried on the plant and the seeds have turned brown. This usually occurs in late summer or early autumn.
- Visual Inspection: Look for the dried, umbrella-like clusters of seed heads at the top of the stalks. These contain the mature seeds.
2. Collecting Seed Heads:
- Cutting: Use scissors or garden shears to snip off the stems that have mature, dry seed heads.
- Handling: Carefully place these stems into a paper bag to catch any seeds that might fall as the seed heads continue to dry and open further.
3. Drying the Seed Heads:
- Environment: Ensure the seed heads are kept in a warm, dry place with good air circulation. Proper drying is essential for easy seed extraction.
- Preparation for Seed Removal: The seed heads should be completely dry and brittle, indicating they are ready for seed extraction.
4. Extracting the Seeds:
- Shaking: Vigorously shake the dried stems inside the bag or over a bowl to release the seeds from the umbels.
- Sieving: Use a fine mesh sieve to sift the seeds, allowing them to fall into a bowl while keeping the larger plant debris out.
5. Storing the Seeds:
- Labeling: Use the Liqui-Dirt Seed Preservation Pouch for storage; this pouch is pre-labeled for convenience.
- Storage Conditions: Store the seeds in the Seed Vault main pouch in a cool, dry place to maintain their viability and protect them from moisture.
Additional Tips:
- Plant Health: Harvest seeds from the healthiest Parsley plants to ensure robust growth in future crops.
- Pest Control: Inspect the seed heads for any signs of pests or diseases before collecting them; avoid using seeds from compromised plants.
- Seed Testing: To verify seed viability, perform a germination test by planting a few seeds in moist soil to see if they sprout.
Reminder:
- Reordering Seeds: Make sure to reorder your Parsley seeds from Liqui-Dirt Organic Nursery and Garden at least four weeks before the planting season to ensure you are fully prepared.
By following these organized steps, you can effectively harvest and securely store your Parsley seeds, ensuring that you have high-quality seeds ready for the next planting season or for use in your culinary creations.
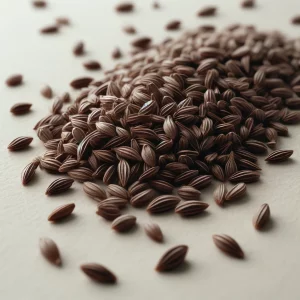
Rosemary Herb Seeds ready for planting
Rosemary Herb Seed, known scientifically as Rosmarinus officinalis, is a fragrant, evergreen herb native to the Mediterranean region. With a history steeped in myth, folklore, and practical use, rosemary has been a staple in gardens and kitchens for centuries. The ancient Greeks and Romans associated rosemary with memory and loyalty, often wearing rosemary wreaths during important ceremonies. In the Middle Ages, it was used for a variety of purposes, from warding off evil spirits to being a key component in herbal medicines.
Rosemary is characterized by its strong, pungent aroma, which is pine-like with hints of lemon and wood. Its flavor is equally robust, making it an excellent complement to a wide range of culinary dishes. The needle-like leaves are quite tough and are usually chopped finely or used whole and removed before serving.
One of rosemary’s unique characteristics is its resilience. As a perennial in zones 8-10, it can survive in poor, dry soils and needs little water once established, making it perfect for xeriscaping or drought-prone gardens. Rosemary’s woody stems also grow quite thick, allowing it to be shaped into decorative forms, often seen in formal herb gardens.
In culinary uses, rosemary is incredibly versatile. It pairs well with a variety of meats, especially lamb, pork, and chicken. It’s also commonly used to flavor bread, pizza, and potato dishes. Rosemary’s strong flavor holds up well during cooking, which makes it ideal for roasting and grilling.
Beyond its culinary appeal, rosemary has several other uses. It is a popular choice in aromatic and medicinal applications because of its essential oils, which are believed to have anti-inflammatory, anti-bacterial, and antioxidant properties. Rosemary is also used in hair rinses to stimulate growth and in various household cleaning products for its scent and disinfectant properties.
Rosemary not only enriches a variety of dishes but also adds beauty and fragrance to gardens and homes, making it a cherished herb in both culinary and decorative landscapes.
Rosemary Herb Seeds (Rosmarinus officinalis) is a highly aromatic and resilient herb seeds that is popular in gardens and kitchens worldwide. Here’s how you can grow herb seeds, care for, harvest, and preserve this wonderful herb:
Growing Rosemary Herb Seeds:
- Planting Location: Rosemary herb seeds thrive in full sun and well-drained soil. It’s herb seeds prefers a slightly alkaline soil pH but can tolerate a range from neutral to alkaline.
- Starting Rosemary herb seeds: While you can grow rosemary from herb seeds, it’s much easier and faster to start with cuttings or buy young plants from a nursery. Rosemary can take a long time to germinate and grow slowly in its initial stages.
- Soil Preparation: Ensure good drainage as rosemary herb seeds does not like wet feet and can suffer from root rot in poorly drained soils. If you have clay soil, consider growing rosemary in raised beds or containers.
Caring for Rosemary herb seeds:
- Watering: Once established, rosemary is drought tolerant and needs water only when the soil is dry. Overwatering can harm the plant, so let the soil dry out between watering.
- Fertilizing: Rosemary herb seeds generally does not require a lot of fertilizer. If necessary, a light application of a balanced, slow-release fertilizer in the spring can be beneficial.
- Pruning: Regular pruning not only helps maintain its shape but also encourages new growth. Trim the plant after it blooms to keep it compact and bushy.
Harvesting Rosemary:
- When to Harvest: You can start harvesting rosemary once the plant is large enough to sustain cutting. Rosemary can be harvested as needed by snipping off sprigs from the plant.
- How to Harvest: Use sharp scissors or pruners to cut sprigs of rosemary. Always leave at least two-thirds of the plant intact to avoid stressing it too much.
Preserving Rosemary:
- Drying: Rosemary dries very well, retaining much of its flavor. Tie sprigs together and hang them upside down in a dry, well-ventilated area away from direct sunlight. Once dried, remove the leaves from the stems and store them in an airtight container.
- Freezing: Rosemary also freezes well. You can freeze whole sprigs on a baking sheet and then transfer them to a freezer bag, or finely chop the leaves and freeze them in ice cube trays covered with water or olive oil.
- Using Fresh: Fresh rosemary can be stored in the refrigerator. Wrap the sprigs in a slightly damp paper towel and place them in a zip-lock bag. Alternatively, you can place the stem ends in a jar of water like a bouquet of flowers.
Growing rosemary herb seeds adds a beautiful, aromatic touch to your garden, and its versatile use in cooking makes it a kitchen staple. With minimal care, rosemary provides a continuous supply of flavor for your culinary creations.
Seed Saving For The Future: Here’s a comprehensive guide on how to harvest and store seeds from Rosemary (Rosmarinus officinalis), utilizing best practices to ensure you collect the best quality seeds for your gardening:
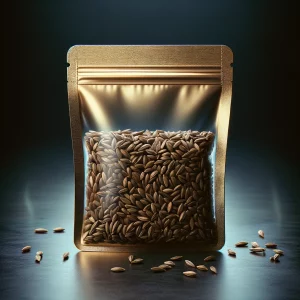
Rosemary with Liqui-Dirt Seed Vault Storage Pouch
Tools Needed:
- Scissors or garden shears
- Liqui-Dirt Seed Preservation Pouch
- Paper Bag
- A fine mesh sieve
- Container or bowl
Steps to Harvest Rosemary Seeds:
1. Identifying Seed Heads:
- Timing: Monitor your Rosemary plants as they mature. The best time for seed harvesting is when the small, pale blue flowers have faded and the seed heads beneath have dried on the plant. This typically occurs in late summer or early autumn.
- Visual Inspection: Look for the dried seed heads located at the base of where the flowers were. These heads contain the tiny seeds.
2. Collecting Seed Heads:
- Cutting: Use scissors or garden shears to carefully cut the stems that have mature, dry seed heads.
- Handling: Gently place these stems into a paper bag to catch any seeds that might fall as the seed heads continue to dry and potentially open.
3. Drying the Seed Heads:
- Environment: Ensure the seed heads are kept in a warm, dry place with good air circulation. Adequate drying is crucial for successful seed extraction.
- Preparation for Seed Removal: The seed heads should be completely dry and brittle to the touch, ready to crumble when handled.
4. Extracting the Seeds:
- Shaking: Vigorously shake the dried stems inside the bag or over a bowl to loosen and release the seeds from the seed heads.
- Sieving: Use a fine mesh sieve to sift the seeds, allowing them to fall into a bowl while keeping the plant debris out.
5. Storing the Seeds:
- Labeling: Use the Liqui-Dirt Seed Preservation Pouch for storing your seeds; this pouch is pre-labeled for your convenience.
- Storage Conditions: Store the seeds in the Seed Vault main pouch in a cool, dry place to maintain their viability and protect them from moisture.
Additional Tips:
- Plant Health: Select seeds from the healthiest Rosemary plants to promote vigorous growth in the next planting season.
- Pest Control: Inspect the seed heads for any signs of pests or disease before and during the drying process; discard any compromised material.
- Seed Testing: To assess seed viability, perform a germination test by planting a few seeds in moist soil to see if they sprout.
Reminder:
- Reordering Seeds: Be sure to reorder your Rosemary seeds from Liqui-Dirt Organic Nursery and Garden at least four weeks before the next planting season to ensure you are fully prepared.
By following these steps, you can effectively harvest and securely store your Rosemary seeds, ensuring that you have high-quality seeds ready for planting or for culinary use in your kitchen.
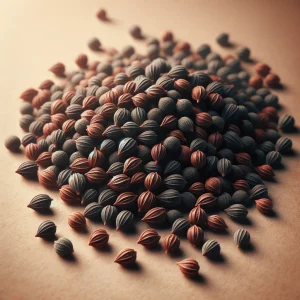
Sage Herb Seeds ready for planting
Sage herb seeds, scientifically known as Salvia officinalis, is a revered herb with a long history of culinary and medicinal use. Native to the Mediterranean region, sage has been utilized since ancient times, valued by the Greeks and Romans for its healing properties and considered sacred. The Romans used it in sacred rituals, believing it to enhance wisdom and mental acuity, which is reflected in its genus name, Salvia, derived from the Latin word salvere, meaning “to save” or “to cure.”
The flavor of sage is earthy, slightly peppery with hints of mint, and it has a strong aromatic quality that makes it a robust addition to a variety of dishes. Its leaves are grayish-green, with a velvety texture, and it produces blue to purplish flowers that are also edible.
One of sage’s unique characteristics is its high content of volatile oils, which contribute to its pronounced flavor and are believed to have numerous health benefits. These oils contain compounds like thujone, camphor, and chenille, which are thought to have anti-inflammatory, antibacterial, and antiseptic properties.
Culinarily, sage is a staple herb in many traditional European cuisines, particularly Italian, British, and Balkan. It pairs well with rich foods like pork, beef, duck, and fatty fish due to its robust flavor. Sage is famously used in stuffing for poultry, in sausages, and in butter sauces for pasta. Dried sage tends to have a more concentrated flavor than fresh and is often preferred in slow-cooked dishes.
Beyond its culinary uses, sage has a storied history in folk medicine, traditionally used to treat everything from mental disorders to gastrointestinal discomfort. It has also been used as a natural preservative and antiseptic, and in modern times, it is often found in natural dental and gum care products due to its antibacterial properties.
Sage is also valued as an ornamental plant in gardens, not only for its culinary and medicinal qualities but for its attractive foliage and flowers that attract pollinators like bees.
In essence, sage is a multifaceted herb that enriches both the garden and the kitchen, providing flavor, health benefits, and beauty.
Sage herb seeds (Salvia officinalis) is a hardy perennial herb seeds that is not only valuable for its culinary and medicinal properties but also enhances the garden with its decorative, gray-green foliage and lovely flowers. Here’s how to successfully grow the herb seeds, care for, harvest, and preserve sage:
Growing Sage Herb Seeds:
- Planting Location: Sage herb seeds thrive in full sun and well-drained soil. It prefers slightly alkaline conditions but is quite adaptable to different soil types as long as they are not too wet.
- Starting from Herb Seeds or Cuttings: While you can start sage from herb seeds, it’s often easier and faster to begin with cuttings or by purchasing young plants. If starting from herb seeds, sow herb seeds indoors 6-8 weeks before the last frost date. Transplant outdoors when the seedlings are sturdy enough and the danger of frost has passed.
- Spacing: Plant sage about 18-24 inches apart to allow for its growth into a bushy plant.
Caring for Sage:
- Watering: Sage is drought-tolerant once established. Water the plants evenly during the initial growth period. Once mature, water sparingly, only ensuring the plant does not dry out completely.
- Feeding: Sage does not require much fertilization. A light application of a balanced fertilizer in the spring can be sufficient for the growing season.
- Pruning: Regular pruning not only helps maintain an attractive shape but also encourages new growth. Trim sage plants in the spring to remove any old, woody stems and again after flowering to prevent the plant from becoming leggy.
Harvesting Sage:
- When to Harvest: The best time to harvest sage leaves is before the plant flowers, typically in late spring to early summer. The leaves are most flavorful at this point.
- How to Harvest: Cut leaves or branches as needed. Always leave enough leaves on the plant to ensure it continues to thrive.
Preserving Sage:
- Drying: Sage dries well and retains much of its flavor. Tie the cuttings in small bunches and hang them upside down in a dry, well-ventilated place away from direct sunlight. Once completely dry, remove the leaves from the stems and store in an airtight container.
- Freezing: Sage can also be frozen. Chop the fresh leaves and place them in an ice cube tray covered with water or olive oil, then freeze. Alternatively, you can freeze whole leaves laid out on a baking sheet before transferring to a freezer bag.
- Storing Dried Sage: Keep dried sage in an airtight container in a cool, dark place to preserve its essential oils and flavor.
Sage herb seeds is a low-maintenance herb seeds that offers multiple uses from the kitchen to natural home remedies. With proper care, it can provide a steady supply of aromatic leaves year-round.
Seed Saving For The Future: Here’s an expert guide on how to harvest and store seeds from Sage (Salvia officinalis), employing effective techniques to ensure high-quality seeds for your next planting:
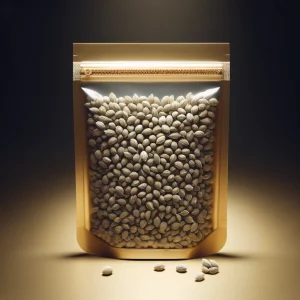
Sage with Liqui-Dirt Seed Vault Storage Pouch
Tools Needed:
- Scissors or garden shears
- Liqui-Dirt Seed Preservation Pouch
- Paper Bag
- A fine mesh sieve
- Container or bowl
Steps to Harvest Sage Seeds:
1. Identifying Seed Heads:
- Timing: Monitor your Sage plants as they flower and mature. The best time for seed harvesting is when the flower spikes have dried on the plant and the seeds have turned brown. This typically occurs in late summer or early autumn.
- Visual Inspection: Look for the dried flower spikes; they will contain small, brown seeds nestled within the faded blooms.
2. Collecting Seed Heads:
- Cutting: Use scissors or garden shears to carefully cut the stems that have mature, dry seed heads.
- Handling: Place these stems into a paper bag to catch any seeds that might fall as the seed heads continue to dry and potentially open.
3. Drying the Seed Heads:
- Environment: Ensure the seed heads are kept in a warm, dry place with good air circulation. Proper drying is essential for easy seed extraction.
- Preparation for Seed Removal: The seed heads should be completely dry and brittle, ready to crumble when handled.
4. Extracting the Seeds:
- Shaking: Vigorously shake the dried stems inside the bag or over a bowl to release the seeds from the flower spikes.
- Sieving: Use a fine mesh sieve to sift the seeds, allowing them to fall into a bowl while keeping the floral debris out.
5. Storing the Seeds:
- Labeling: Use the Liqui-Dirt Seed Preservation Pouch for storage; this pouch is pre-labeled for convenience.
- Storage Conditions: Store the seeds in the Seed Vault main pouch in a cool, dry place to maintain their viability and protect them from moisture.
Additional Tips:
- Plant Health: Harvest seeds from the healthiest Sage plants to ensure vigorous growth in future plantings.
- Pest Control: Inspect the seed heads for any signs of pests or disease before collecting them; avoid using seeds from compromised plants.
- Seed Testing: To check seed viability, perform a germination test by planting a few seeds in moist soil to see if they sprout.
Reminder:
- Reordering Seeds: Remember to reorder your Sage seeds from Liqui-Dirt Organic Nursery and Garden at least four weeks before the planting season to ensure you are fully prepared.
By adhering to these steps, you can efficiently harvest and securely store your Sage seeds, guaranteeing that you have high-quality seeds ready for the next planting season or for use in culinary dishes.
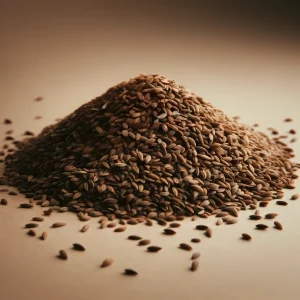
St.-Johns-Wort Herb Seeds ready for planting
St. John’s Wort herb seeds (Hypericum perforatum) is a perennial herb renowned for its medicinal properties and distinguished by its vibrant yellow flowers. It has a rich history that spans centuries, with the earliest records indicating its use in ancient Greece for a variety of ailments. The name “St. John’s Wort” originates from its traditional harvesting on St. John’s Day, June 24th, as the herb is said to bloom around the birthday of John the Baptist. The term “wort” is an old English word for plant or herb.
The flowers and leaves of St. John’s Wort are the most commonly used parts of the plant. They contain hypericin and hyperforin, compounds thought to have potent antidepressant and anti-inflammatory properties. Its flavor is somewhat bitter and astringent, making it less popular as a culinary herb and more valued for its health benefits.
One of the unique characteristics of St. John’s Wort is the perforated appearance of its leaves. When held up to the light, tiny oil glands shine through, giving the appearance of holes, hence the name perforatum. This feature is not only fascinating but also aids in the identification of the herb.
St. John’s Wort is best known for its use in treating depression. Numerous studies have suggested that it can be effective for mild to moderate depression with fewer side effects than many conventional antidepressants. Beyond its mood-regulating effects, St. John’s Wort is also used to treat wounds, bruises, burns, and muscle pains due to its anti-inflammatory properties.
Topically, St. John’s Wort oil—infused with the flowers of the plant—is used in herbal medicine to treat skin conditions such as eczema and psoriasis. It is also applied to the skin to help heal wounds and reduce the appearance of scars.
Despite its benefits, St. John’s Wort is known to interact with a variety of medications, so it should be used with caution and under medical supervision, particularly if other medications are being taken.
In gardens, St. John’s Wort is valued for its ornamental qualities and its ability to attract pollinators like bees and butterflies. Its hardiness and low-maintenance care make it a suitable choice for many gardeners looking to add a beneficial herb to their landscape.
St. John’s Wort Herb Seeds (Hypericum perforatum) is a valuable herb known for its medicinal properties. Growing this herb seeds can be a rewarding endeavor due to its beautiful flowers and health benefits. Here’s how to cultivate and care for St. John’s Wort herb seeds effectively:
Growing St. John’s Wort Herb Seeds:
- Planting Location: St. John’s Wort herb seeds thrive in full sun but can tolerate partial shade. It prefers well-drained soil, although it’s herb seeds are quite adaptable to different soil types.
- Soil Requirements: This herb seeds is not particularly demanding about soil quality and can grow in poor soils. However, it’s herb seeds will perform best in slightly dry, sandy soils.
- Planting Herb Seeds: You can start St. John’s Wort from herb seeds or cuttings. If planting seeds, sow the herb seeds in late fall or early spring directly in the ground. The herb seeds need light to germinate, so just press the. herb seeds lightly into the soil surface without covering them. Cuttings can be taken in late spring and planted directly where you want them to grow.
Caring for St. John’s Wort:
- Watering: Water the plants regularly during the first growing season to establish a deep and extensive root system. Once established, St. John’s Wort is quite drought-tolerant and will only need watering during prolonged dry spells.
- Feeding: St. John’s Wort does not require much fertilization. If growth seems slow, you can apply a light application of a balanced organic fertilizer in early spring.
- Pruning: Prune the plants in early spring to encourage bushy growth and prevent them from becoming leggy.
Harvesting St. John’s Wort:
- When to Harvest: The best time to harvest St. John’s Wort is just as the flowers begin to open, typically in mid to late summer. This is when the concentration of active compounds such as hypericin is at its highest.
- How to Harvest: Cut the top third of the plant, including the flower buds and leaves. Use a sharp knife or scissors to make clean cuts.
Preserving St. John’s Wort:
- Drying: Hang the harvested plant material in small bunches in a dark, well-ventilated area to dry. Avoid direct sunlight, which can degrade the active compounds. Once dry, strip the flowers and leaves from the stems and store them in an airtight container away from light.
- Making Infusions: You can use fresh or dried flowers to make St. John’s Wort oil. Fill a jar with the flowers, then pour olive oil or another carrier oil over them until fully submerged. Let the jar sit in a sunny window for about four weeks, shaking daily. Strain the oil through cheesecloth and store in a dark bottle.
Growing St. John’s Wort herb seeds are relatively straightforward, and it provides both aesthetic and therapeutic value. Whether used in homemade remedies or as a beautiful addition to garden beds, St. John’s Wort is a herb with numerous benefits.
Seed Saving For The Future: Here’s a comprehensive guide on how to harvest and store seeds from St. John’s Wort (Hypericum perforatum), using established methods to ensure you collect the best quality seeds for your next planting:
St.-Johns-Wort with Liqui-Dirt Seed Vault Storage Pouch
Tools Needed:
- Scissors or garden shears
- Liqui-Dirt Seed Preservation Pouch
- Paper Bag
- A fine mesh sieve
- Container or bowl
Steps to Harvest St. John’s Wort Seeds:
1. Identifying Seed Heads:
- Timing: Monitor your St. John’s Wort plants as they mature. The ideal time to harvest seeds is when the seed heads have dried on the plant and the seeds within have turned from green to brown. This generally occurs in late summer to early autumn.
- Visual Inspection: Look for the dried, capsule-like seed heads that form after the flowers have faded.
2. Collecting Seed Heads:
- Cutting: Use scissors or garden shears to carefully snip off the stems that have mature, dry seed heads.
- Handling: Gently place these stems into a paper bag to catch any seeds that might fall as the seed heads continue to dry and potentially open.
3. Drying the Seed Heads:
- Environment: Ensure the seed heads are stored in a warm, dry place with good air circulation. Adequate drying is crucial for successful seed extraction.
- Preparation for Seed Removal: The seed heads should be completely dry and brittle, making them easy to break open when handled.
4. Extracting the Seeds:
- Shaking: Vigorously shake the dried stems inside the bag or over a bowl to loosen and release the seeds from the seed heads.
- Sieving: Use a fine mesh sieve to sift the seeds, filtering out any plant debris and allowing the small seeds to collect in the bowl below.
5. Storing the Seeds:
- Labeling: Use the Liqui-Dirt Seed Preservation Pouch for storing your seeds; this pouch is pre-labeled for convenience.
- Storage Conditions: Store the seeds in the Seed Vault main pouch in a cool, dry place to maintain their viability and protect them from moisture.
Additional Tips:
- Plant Health: Only harvest seeds from the healthiest St. John’s Wort plants to ensure the best growth potential for future plantings.
- Pest Control: Inspect the seed heads for any signs of pests or disease before collecting them; discard any that are compromised.
- Seed Testing: To assess seed viability, perform a germination test by planting a few seeds in moist soil to see if they sprout.
Reminder:
- Reordering Seeds: Be sure to reorder your St. John’s Wort seeds from Liqui-Dirt Organic Nursery and Garden at least four weeks before the planting season to ensure you are fully prepared.
By following these detailed steps, you can effectively harvest and securely store your St. John’s Wort seeds, ensuring that you have high-quality seeds ready for planting or for use in herbal remedies.
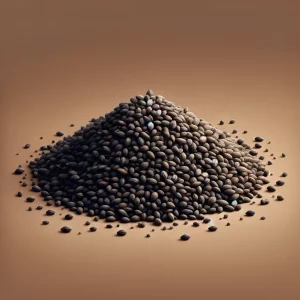
Summer-Savory Herb Seeds ready for planting
Summer Savory herb seeds, known scientifically as Satureja hortensis, is a delicate and aromatic herb that belongs to the mint family. This annual plant is native to the warm temperate regions of Southern Europe and has been cultivated for centuries for its culinary and medicinal properties. Its use dates back to the Romans, who appreciated its peppery flavor and used it to enhance the taste of their food and as a medicine to aid digestion.
Summer Savory offers a sharp, peppery flavor with hints of thyme and marjoram, making it a favored seasoning in a variety of dishes. Its leaves are small, narrow, and green, growing on bushy plants that can reach up to 18 inches in height. The plant also produces small, lilac-pink flowers in late summer, which are both edible and decorative.
One of the unique characteristics of Summer Savory is its ability to blend well with other herbs and spices without overwhelming them. This makes it extremely versatile in cooking. It is particularly popular in European cuisine, especially in the herb mixes used in Eastern Europe and Canada, where it is a key ingredient in traditional stuffing and sausages.
Summer Savory is also valued for its digestive benefits. It contains thymol and carvacrol, compounds known for their antiseptic and antibacterial properties, which can help alleviate intestinal discomfort and promote better digestion. The herb has been traditionally used in teas to relieve throat pains and coughs.
In the culinary world, Summer Savory is often used fresh or dried. It enhances the flavor of beans, lentils, meats, and poultry. Its robust taste is especially good in marinades or as a seasoning for grilled meats and fish. When used fresh, it brings a bright, peppery zing to salads and dressings.
Summer Savory also serves as an excellent companion plant in gardens, helping to repel pests and attract pollinators with its flowers. Easy to grow and care for, Summer Savory thrives in well-drained soil and full sun, making it a suitable addition to both herb gardens and window boxes.
Whether used to season food, as a medicinal tea, or as a part of garden planting, Summer Savory is a delightful herb with a rich history and a wide range of applications.
Summer Savory herb seeds (Satureja hortensis) is an aromatic herb seeds valued for its culinary versatility and ease of growth. Here’s how you can cultivate, care for, and preserve this delightful annual herb seeds:
Growing Summer Savory Herb Seeds:
- Planting Location: Summer Savory herb seeds thrive in full sun and well-drained soil. It’s herb seeds prefers a slightly alkaline soil pH but is fairly adaptable to different soil types as long as the herb seeds are not too wet.
- Starting from Herb Seed: You can sow Summer Savory herb seeds directly in the garden after the last frost when the soil has warmed up. Plant the herb seeds about 1/4 inch deep and space them or thin seedlings to about 6-8 inches apart.
- Container Growing: If space is limited, Summer Savory herb seeds also grows well in containers. Ensure the pot has good drainage holes and use a well-draining potting mix.
Caring for Summer Savory:
- Watering: Water the plants regularly, especially during dry periods, to keep the soil evenly moist but not waterlogged. Once established, Summer Savory is somewhat drought-tolerant.
- Feeding: Fertilize lightly with a balanced organic fertilizer at planting and possibly again midseason if the plants seem to be growing slowly or the leaves are pale.
- Pruning: Pinching back the growing tips when the plants are young will encourage bushier growth and prevent the plants from getting leggy.
Harvesting Summer Savory:
- When to Harvest: The best time to harvest Summer Savory is just before the plant flowers, typically in mid to late summer. This is when the essential oils and flavors are most concentrated.
- How to Harvest: Cut the stems using scissors or garden shears, leaving at least a few inches of growth so the plant can continue to grow.
Preserving Summer Savory:
- Drying: Summer Savory dries well and retains much of its flavor. Tie the cut stems into small bundles and hang them upside down in a warm, dry, well-ventilated place away from direct sunlight. Once completely dry, strip the leaves from the stems and store them in an airtight container.
- Freezing: Alternatively, you can freeze Summer Savory to preserve its flavor. Chop the fresh leaves and place them in an ice cube tray covered with water or olive oil, then freeze. The cubes can be added directly to soups, stews, and other dishes.
- Storing Dried Herbs: Keep dried Summer Savory in a cool, dark place in an airtight container to maintain its aroma and flavor for up to a year.
Growing Summer Savory herb seeds is straightforward and rewarding, providing a fresh supply of this aromatic herb throughout the summer. Its culinary uses and ease of preservation make it a valuable addition to any home garden.
Seed Saving For The Future: Here’s a detailed guide on how to harvest and store seeds from Summer Savory (Satureja hortensis), employing effective techniques to ensure you collect high-quality seeds for your next planting:

Summer-Savory with Liqui-Dirt Seed Vault Storage Pouch
Tools Needed:
- Scissors or garden shears
- Liqui-Dirt Seed Preservation Pouch
- Paper Bag
- A fine mesh sieve
- Container or bowl
Steps to Harvest Summer Savory Seeds:
1. Identifying Seed Heads:
- Timing: Monitor your Summer Savory plants as they flower and mature. The optimal time for seed harvesting is when the seed heads have dried on the plant and the seeds have turned brown. This usually occurs in late summer or early autumn.
- Visual Inspection: Look for the dried, brown seed heads that form after the flowers fade. These contain the small seeds.
2. Collecting Seed Heads:
- Cutting: Use scissors or garden shears to carefully trim the stems that bear mature, dry seed heads.
- Handling: Place these trimmed stems into a paper bag to catch any seeds that might fall as the heads continue to dry and open.
3. Drying the Seed Heads:
- Environment: Ensure that the seed heads are stored in a warm, dry place with good air circulation to promote thorough drying.
- Preparation for Seed Removal: The seed heads should be completely dry and brittle, making them easy to break open when handled.
4. Extracting the Seeds:
- Shaking: Vigorously shake the dried stems inside the bag or over a bowl to release the seeds from the seed heads.
- Sieving: Use a fine mesh sieve to sift the seeds, allowing them to fall into a bowl while keeping the larger plant debris out.
5. Storing the Seeds:
- Labeling: Use the Liqui-Dirt Seed Preservation Pouch for storing your seeds; this pouch is pre-labeled for your convenience.
- Storage Conditions: Store the seeds in the Seed Vault main pouch in a cool, dry place to maintain their viability and protect them from moisture.
Additional Tips:
- Plant Health: Harvest seeds from the healthiest Summer Savory plants to ensure robust growth in future crops.
- Pest Control: Inspect the seed heads for any signs of pests or diseases before collecting them; avoid using seeds from compromised plants.
- Seed Testing: To verify seed viability, perform a germination test by planting a few seeds in moist soil to see if they sprout.
Reminder:
- Reordering Seeds: Make sure to reorder your Summer Savory seeds from Liqui-Dirt Organic Nursery and Garden at least four weeks before the planting season to ensure you are fully prepared.
By following these steps, you can efficiently harvest and securely store your Summer Savory seeds, guaranteeing that you have high-quality seeds ready for the next planting season or for use in culinary dishes.
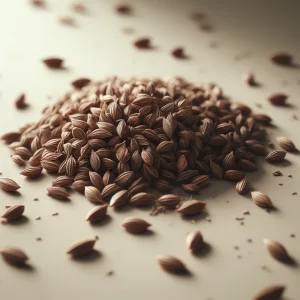
Thyme Herb Seeds ready for planting
Thyme Herb Seeds, known scientifically as Thymus vulgaris, is a versatile and aromatic herb that belongs to the mint family. Native to the Mediterranean region, it has been cultivated and used for thousands of years, not only for its culinary applications but also for its medicinal properties. Ancient Egyptians used thyme in embalming practices, while the Greeks used it as incense in temples, believing it was a source of courage. Romans used thyme to purify their rooms and added it to cheese and alcoholic beverages, while in the Middle Ages, it was placed beneath pillows to aid sleep and ward off nightmares.
Thyme is characterized by its tiny, firm leaves growing on woody stems and small, pale purple flowers that are also edible. The flavor of thyme is subtly earthy with lemony and minty tones, making it a favorite in various cuisines around the world. It is particularly noted for its use in French, Italian, and Mediterranean dishes, and it is one of the herbs in the traditional French bouquet garni and herbes de Provence.
One of thyme’s unique characteristics is its high concentration of essential oils, particularly thymol, which is known for its antiseptic properties. This makes thyme not only great for culinary use but also valuable for its medicinal benefits. It has been used historically as an antiseptic, to treat ailments like bronchitis and sore throat, and as a tea to relieve digestive issues.
In the kitchen, thyme is incredibly versatile. It can be used to flavor meats, soups, and stews, and it pairs well with lamb, poultry, and tomatoes. Fresh or dried thyme leaves enhance vegetable dishes, sauces, breads, and marinades. Due to its robust nature, thyme can withstand long cooking times, making it ideal for slow-cooked dishes.
Thyme also holds a place in home gardens not only for its culinary and medicinal properties but for its ornamental qualities. It can be grown as a ground cover or border plant and is particularly good for rock gardens or edging, attracting bees and butterflies with its flowers.
Whether used fresh or dried, thyme adds a sophisticated flavor to dishes and provides numerous health benefits, making it a staple herb in kitchens and gardens alike.
Thyme Herb Seeds (Thymus vulgaris) is a popular and versatile herb seeds that thrive with minimal care, making it a favorite among gardeners and cooks alike. Here’s how to grow this herb seeds, care for, harvest, and preserve thyme:
Growing Thyme Herb Seeds:
- Planting Location: Thyme Herb Seeds thrive in full sun and well-drained soil. It’s herb seeds are particularly suited to rocky or sandy soils and is an excellent choice for xeriscaping or drought-prone gardens.
- Soil Requirements: Thyme herb seeds prefers a light, well-drained soil with a neutral to slightly alkaline pH. It herb seeds don’t do well in wet, heavy soils.
- Starting from Herb Seed or Cuttings: Thyme can be started from herb seeds, but it grows slowly and can take a long time to germinate. For quicker results, consider purchasing young plants or starting from cuttings or division. If planting herb seeds, start them indoors 6-8 weeks before the last frost or sow the herb seeds directly in the garden in spring.
- Caring for Thyme:
- Watering: Once established, thyme is quite drought-tolerant. Water the plants deeply but infrequently, allowing the soil to dry out between waterings.
- Feeding: Thyme generally does not require much fertilization, especially if the soil is of good quality. Over-fertilizing can lead to poor flavor and fewer essential oils.
- Pruning: Regular pruning not only keeps thyme plants bushy and dense but also helps to rejuvenate older plants. Prune back in early spring and after flowering to encourage new growth and prevent woody stems.
Harvesting Thyme:
- When to Harvest: Thyme can be harvested at any time once the plants are established. For the best flavor, harvest just before the plant flowers, typically in late spring to early summer.
- How to Harvest: Snip the stems or pick individual leaves as needed. If you need a large quantity, cut the entire plant back by about one-third to one-half. This can be done a couple of times during the growing season.
Preserving Thyme:
- Drying: Thyme dries well and retains much of its flavor. Tie the cut stems in small bunches and hang them upside down in a warm, dry, well-ventilated area away from direct sunlight. Once dry, strip the leaves from the stems and store them in an airtight container.
- Freezing: Thyme also freezes well. Freeze whole sprigs on a baking sheet, then transfer them to a freezer bag, or finely chop the thyme and freeze it in ice cube trays covered with water or olive oil.
- Storing Dried Thyme: Keep dried thyme in a cool, dark place in an airtight container to maintain its essential oils and flavor for up to a year.
Growing thyme herb seeds are straightforward, and it provides a robust supply of flavor for cooking throughout the year. With its minimal care requirements and multiple methods for preservation, thyme herb seeds are an excellent herb for both novice and experienced gardeners.
Seed Saving For The Future: Here’s a comprehensive guide on how to harvest and store seeds from Thyme (Thymus vulgaris), using proven methods to ensure you collect the best quality seeds for your next planting:
Thyme with Liqui-Dirt Seed Vault Storage Pouch
Tools Needed:
- Scissors or garden shears
- Liqui-Dirt Seed Preservation Pouch
- Paper Bag
- A fine mesh sieve
- Container or bowl
Steps to Harvest Thyme Seeds:
1. Identifying Seed Heads:
- Timing: Keep an eye on your Thyme plants as they mature and flower. The best time for seed harvesting is when the flower heads have dried on the plant and the tiny seeds have turned brown. This usually occurs in late summer or early autumn.
- Visual Inspection: Look for the dried flower heads; they will contain small, brown seeds nestled within the faded blooms.
2. Collecting Seed Heads:
- Cutting: Use scissors or garden shears to snip off the stems that have mature, dry seed heads.
- Handling: Carefully place these stems into a paper bag to catch any seeds that might fall as the seed heads continue to dry and open further.
3. Drying the Seed Heads:
- Environment: Ensure the seed heads are kept in a warm, dry place with good air circulation. Adequate drying is essential for easy seed extraction.
- Preparation for Seed Removal: The seed heads should be completely dry and brittle, making them ready to crumble when handled.
4. Extracting the Seeds:
- Shaking: Vigorously shake the dried stems inside the bag or over a bowl to release the seeds from the flower heads.
- Sieving: Use a fine mesh sieve to sift the seeds, allowing them to fall into a bowl while keeping the floral debris out.
5. Storing the Seeds:
- Labeling: Utilize the Liqui-Dirt Seed Preservation Pouch for storage; this pouch is pre-labeled for your convenience.
- Storage Conditions: Store the seeds in the Seed Vault main pouch in a cool, dry place to maintain their viability and protect them from moisture.
Additional Tips:
- Plant Health: Harvest seeds from the healthiest Thyme plants to ensure vigorous growth in the next season.
- Pest Control: Inspect the seed heads for any signs of pests or disease before collecting them; avoid using seeds from compromised plants.
- Seed Testing: To assess seed viability, perform a germination test by planting a few seeds in moist soil to see if they sprout.
Reminder:
- Reordering Seeds: Be sure to reorder your Thyme seeds from Liqui-Dirt Organic Nursery and Garden at least four weeks before the next planting season to ensure you are fully prepared.
By following these detailed steps, you can effectively harvest and securely store your Thyme seeds, ensuring that you have high-quality seeds ready for planting or for culinary use in your kitchen.